- Turn on your computer and start Microsoft Windows 95 or Microsoft Windows NT 4.0 (Service Pack 3).
- Open a connection to the Internet.
- If you have not already downloaded the Transfer-Mation software to your hard drive, the latest version of the software is available by clicking here.
- Close any applications you have running.
- Open the Windows or Windows NT Explorer and find the location where the installation file was downloaded.
- Double click the installation file. A WinZip session will be created.
- Inside the session, click on 'Extract' to extract all of the files.
- Choose the destination directory for the extracted files. These extracted files can be deleted after the installation is complete.
- Open the directory containing the extracted files.
- Double click the 'setup.exe' icon.
- The Transfer-Mation setup program will now begin.
- After checking to make sure you do not have any running applications, click 'OK' on the first dialog box. (Figure 1)
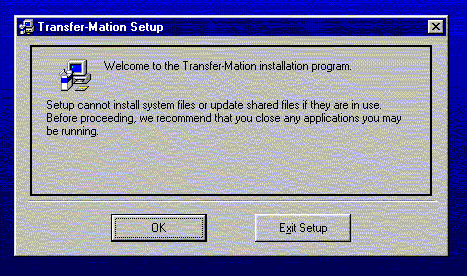
Figure 1: Transfer-Mation Setup: Welcome Box
- The Installation program will choose a directory for Transfer-Mation. On the next dialog box you have the option of changing this. Click 'Change Directory' to change the directory.
- Click the button with the computer image to begin the installation process. (Figure 2)

Figure 2: Transfer-Mation Setup: Begin Installation
- The program will now begin copying files to the specified directory and to your Windows/System directory. (Figure 3)
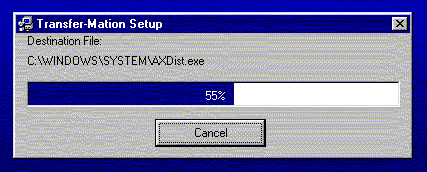
Figure 3: Transfer-Mation Setup: Installation Progress
- The installation program will let you know when it has completed copying the necessary files. (Figure 4)
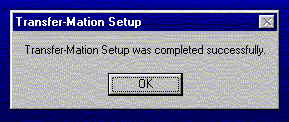
Figure 4: Transfer-Mation Setup: Installation Complete
- After installation is complete, the computer will need to be restarted. This ensures all files will be properly setup and configured for your machine. To restart the computer now, click 'Yes'. Otherwise click 'No' and restart the machine at a later time before running Transfer-Mation.
- Once your computer has been restarted, you can start Transfer-Mation by selecting 'Programs' under your Windows 95/NT 'Start' menu. Transfer-Mation will appear as an icon on the pop up menu.
|
