
|
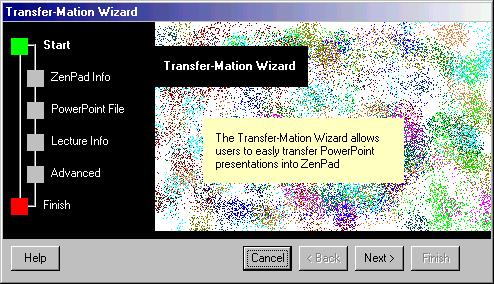
The mission of the Classroom 2000 system, created by the Future Computing
Environments group, is to "put computers in the classroom to do all of
the mundane recording of the class thereby enabling students to spend
more time actively listening to the lecture."* One portion of the
system involves the creation of lecture slides that the instructor can
show to the class, write on through a program called ZenPad, and have the
end result published to the Internet. These slides are typically created
in a presentation graphics program such as Microsoft PowerPoint 97 and
then saved as a series of images. The instructor then moves the slides
to a remote location and is now able to use these images in class with
the ZenPad viewer.
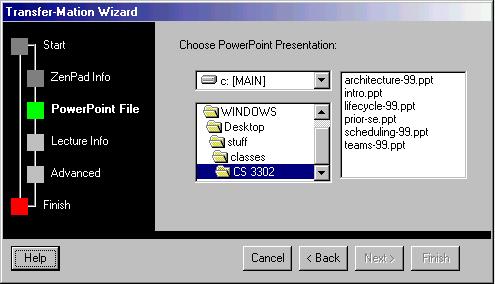
The process of converting these presentations and then moving them to a remote location is a time-consuming and tedious process. It can also be complicated for new users who are not familiar with file transfer protocols, presentation packages or computers in general. Currently only Computer Science classes are taking advantage of and testing this system but there is potential for less technologically inclined disciplines to use the Classroom 2000 project. If Classroom 2000 is to fulfill its aim of using technology to improve education, it should be prepared to deal with novice users. Since Classroom 2000 aims to eliminate the tedious tasks of the students, it should also attempt to do the same for the instructors using the system. To simplify this conversion and transferring process, it is easier to present the user with a familiar and quick way to complete the process. The Transfer-Mation system proposes to automate and simplify the current process after the user creates the presentation slides. The process that convert the slides to a preferred format and transfer them to the specified destination. The Transfer-Mation System will give the user options to allow flexibility in the saving process and where the final graphic images should reside. The current version of the Transfer-Mation System allows novice users to quickly and easily convert their presentations while still providing options for the advanced user to utilize. The novice user only needs to know basic "essential" information for a successful transfer because commonly used settings for the Classroom 2000 are set as the default settings. Users with knowledge of specific image file formats, resolution settings and file paths can enter this information into the Advanced Features dialog box and customize their slide presentation. * taken from the "Building Your Own Classroom 2000 webpage" |
|
|

|
|
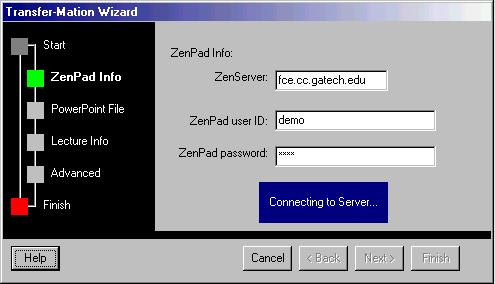
 Figure 2: Transfer-Mation Wizard: ZenPad Info dialog box |
|
|
|
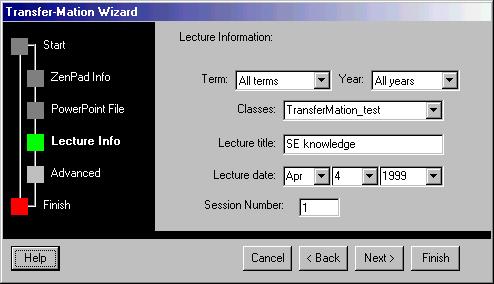 Figure 5: Transfer-Mation: Wizard Lecture Info |
|
|
 Lecture Already Exists
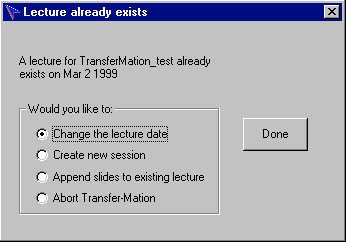 Figure 6: Transfer-Mation Wizard: Lecture Already Exists |
The user will be prompted to:
|
|
|
|
|
Figure 2: Transfer-Mation Wizard: ZenPad Info dialog box |
|
|
|
|
Figure 5: Transfer-Mation: Wizard Lecture Info |
|
|
Lecture Already Exists |
Figure 6: Transfer-Mation Wizard: Lecture Already Exists |
The user will be prompted to:
|
|
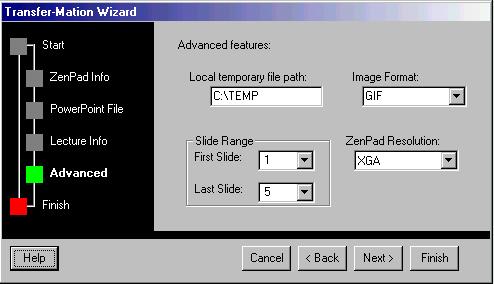 Figure 7: Transfer-Mation Wizard: Advanced |
|
|

|
|
|