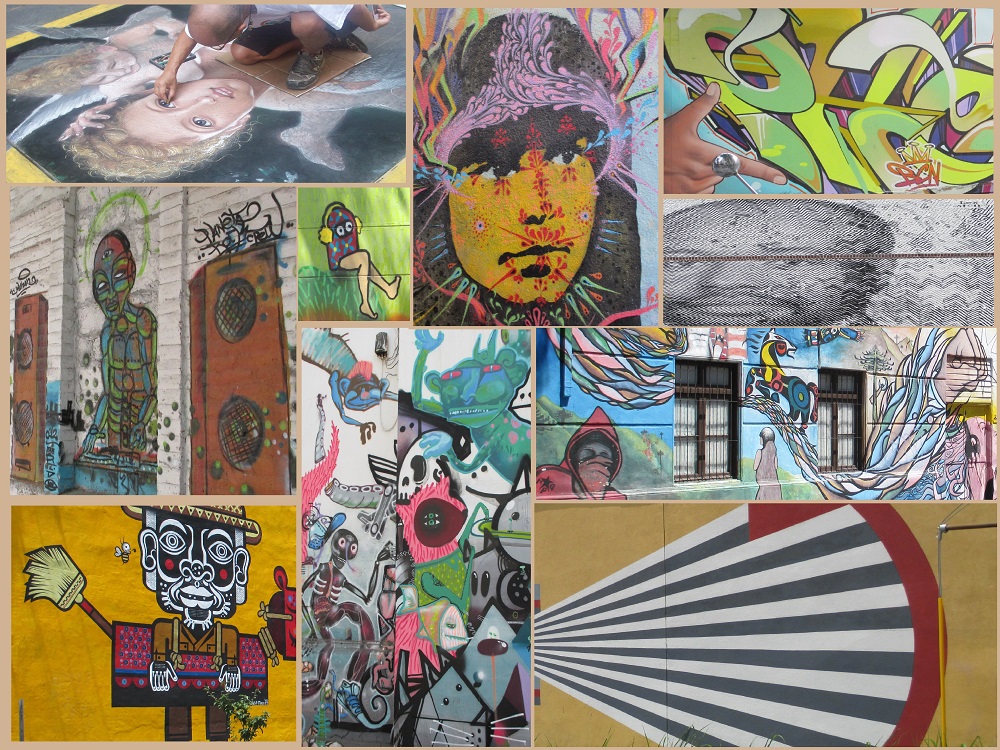
For this project the idea was to incorporate street art from around the world. We decided to take a picture of a blank brick wall to use as our "canvas". Then we overlayed a collage of street art pictures onto our "canvas".
The inspiration came from a picture that Katie took while in Chile:
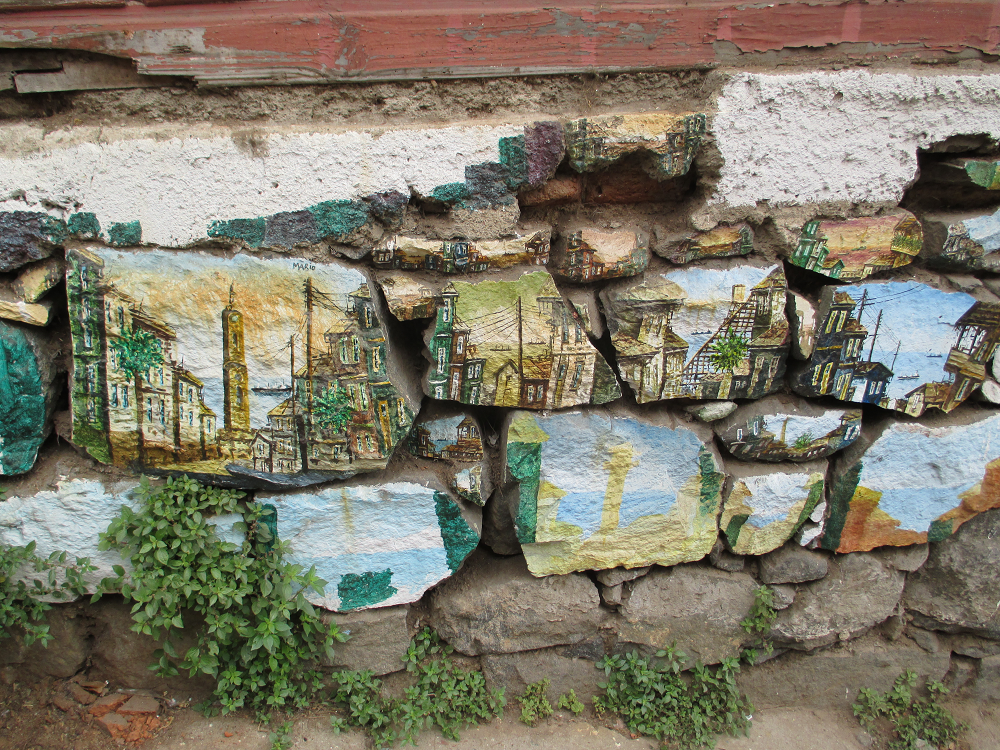
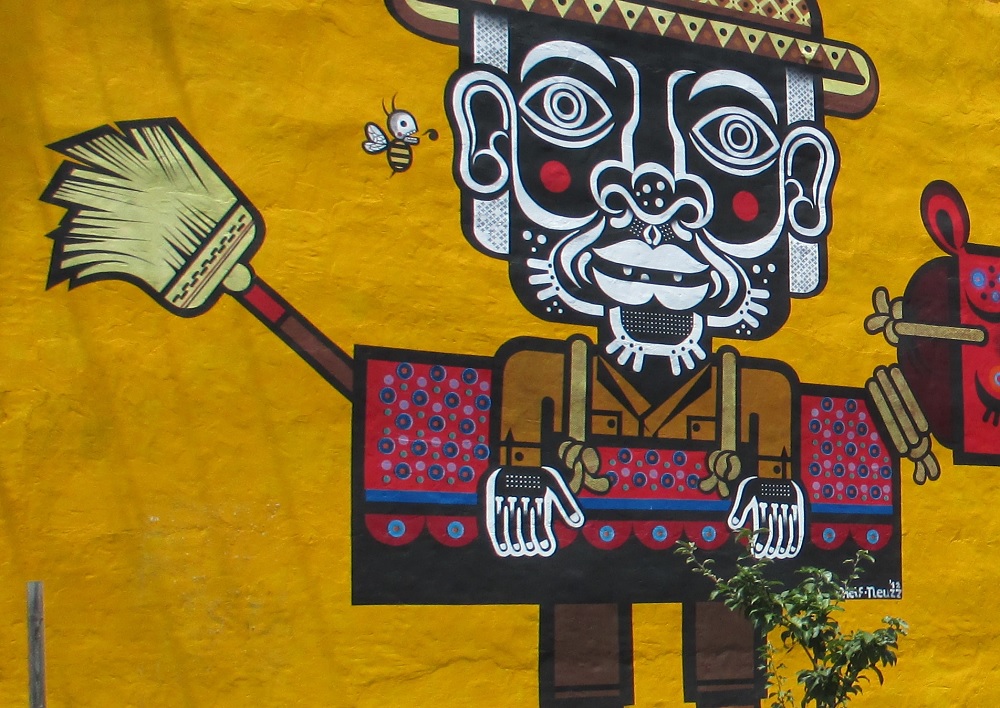
We wanted to mimic this look of separation upon each brick through computational methods, which we achieved. We chose the “painted” picture to be a collage of many photographs depicting street art, that Katie also took.
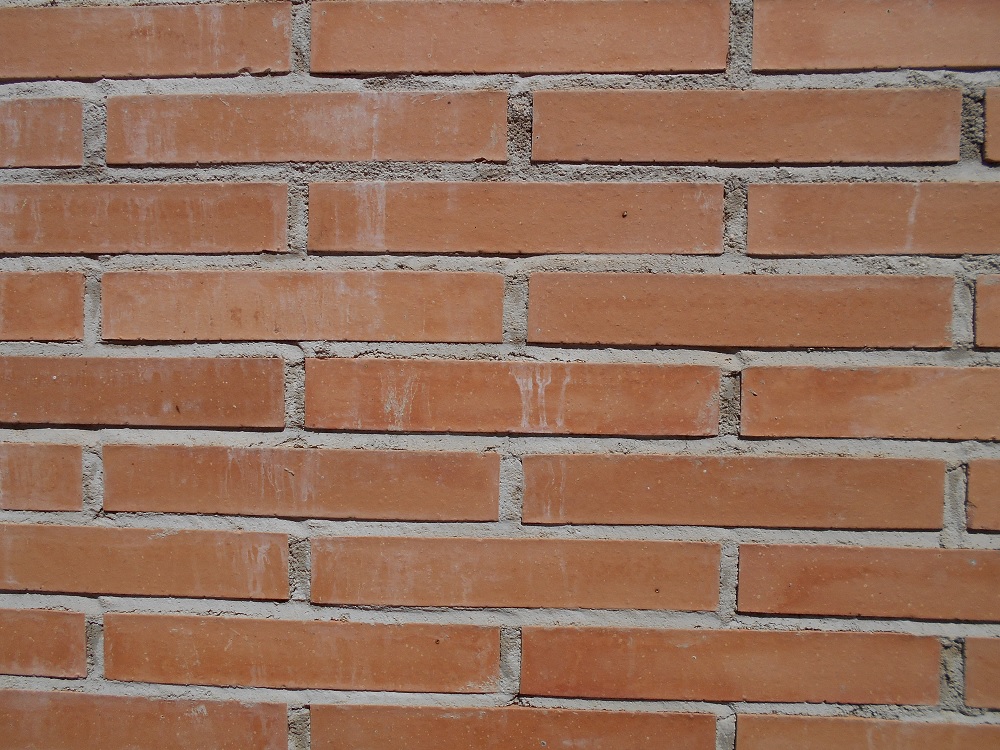
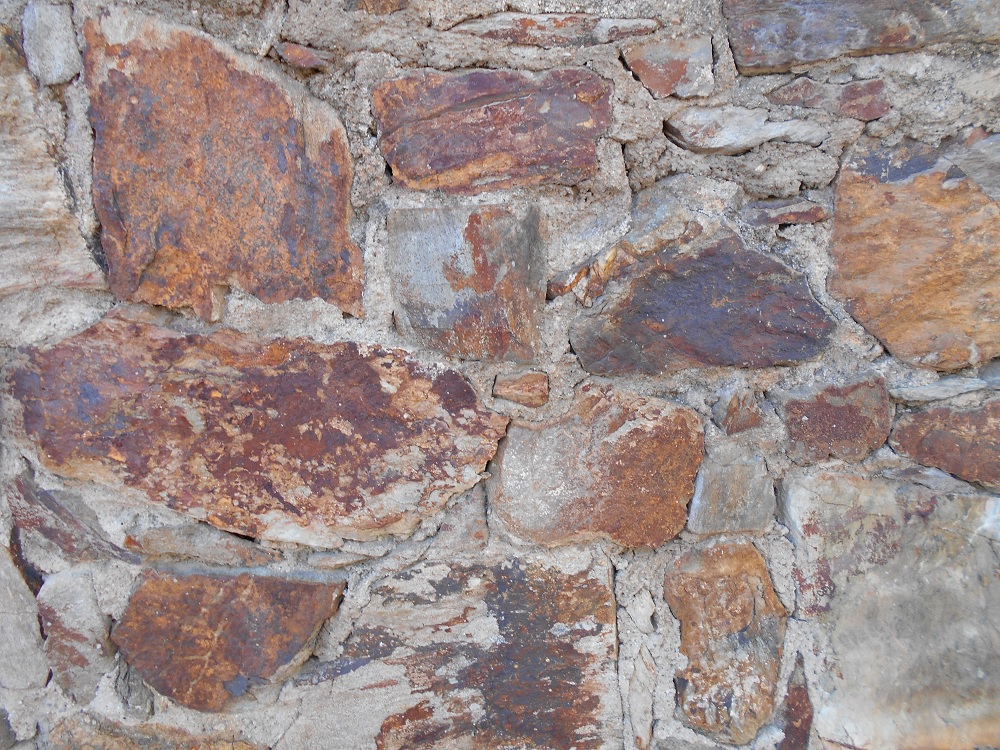
The purpose of this project was to simulate painting on the bricks on a wall, but not on the mortar. Python and openCV were used to pick out which areas were mortar and which were brick. A collage was then overlaid onto the bricks. The result looks artistic in its own right while still staying true to its inspiration. The brick picture was taken on the UPC campus. And the street art picture is a collage of photos taken by Katie of street art from around the world. The collage was made using the Paint application on Windows. Below are the two original pictures we used.
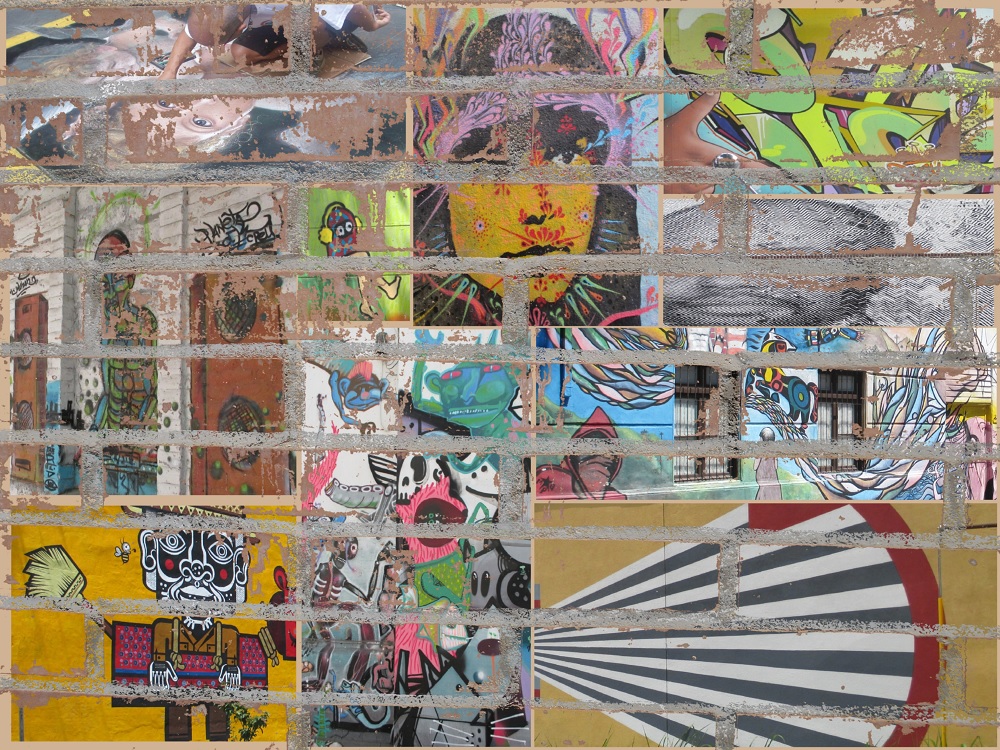
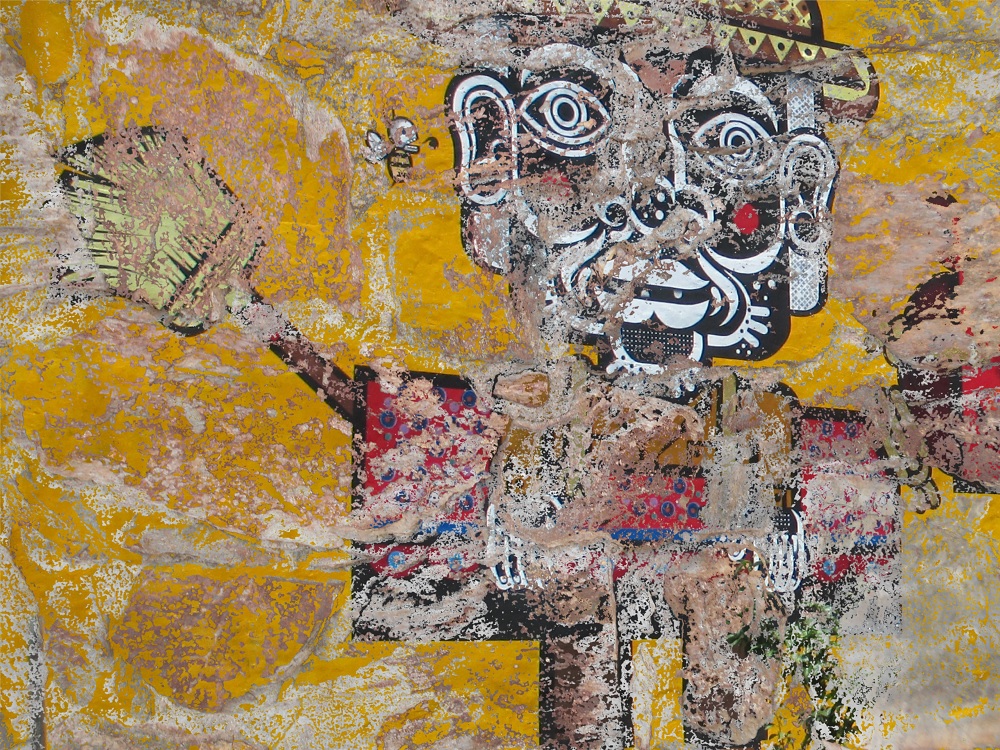
After running the code, this is the output image:
The input images required some work. Both images are required to be jpgs. A suitable photograph of bricks had to be taken, with a clearly visible color distinction between brick and mortar. The collage also had to be amalgamated from various croppings of images, and it was sized to be the same as the background brick photograph.
The images are then run through the python file, drawOverBrick.py. The openCV cv2.imread functions are used to instantiate the images within the program as image1 and image2.
paintWall(image1, image2): the file then runs the wrapper function, with both images as inputs. It first converts both input images into the HSV color model.
findGrout(wallHSV): It creates a groutMask from the function findGrout(wallHSV), which creates a blackand white boolean-like mask that defines regions of mortar and brick. Two variables, the lower_grout_color and upper_grout_color are instantiated to represent the HSV upper and lower limit for mortar color. A new matrix, groutMask, is created by using openCV’s cv2.inRange function, which finds and sets to 255 (black) all the values between the two limits. The mask is written to groutMask.jpg, for viewing, although this is completely optional.
mergeImgs(wallHSV, paintHSV, groutMask): this function creates a new image matrix, mergedImg, which, using the mask found earlier, combines the two images. The outImg is instantiated as an “empty” matrix, to contain the output. An invertMask is found, which is the inverse of the groutMask, and both are divided by 255 to simulate boolean 1/0 representations. Then the values of each image are added then separately multiplied by their proper masks, effectively selecting each pixel as either from the “wall” image or from the “paint” image.
Finally, the output image is returned as an unsigned 8-bit integer. The outImg is instantiated by converting the mergedImg matrix from HSV back to BGR format. Then the outImg is finally put through a gaussian blur for smoothing and outputted.
paintWall(image1, image2: this finally writes the merged image to “mergeImage.jpg”.
All of the python code is proprietary, built upon the openCV library. The upper and lower limits of the mortar coloration were chosen through trial and error fine-tuning. While this grout detection algorithm does work on every image of walls with grout or mortar, it works best with normal grayish mortar colors and uniformly but differently colored bricks. Using wall images of more natural stones yields different results that are unique but still similar to the original intent.
We played around with the image inputs in our code to produce even more cool looking images. Here's an output image that we thought looked good:
The algorithm has worked with most pictures where the brick/stone have distict grout in between. Feel free to use your own pictures in the algorithm (but make sure each image is the same size- the size we used for our images is 5152x3864).