Project 1: Image Filtering and Hybrid Images
Contents
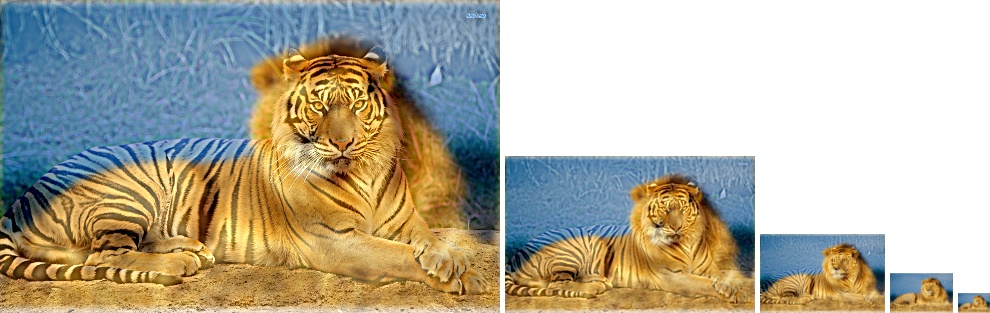
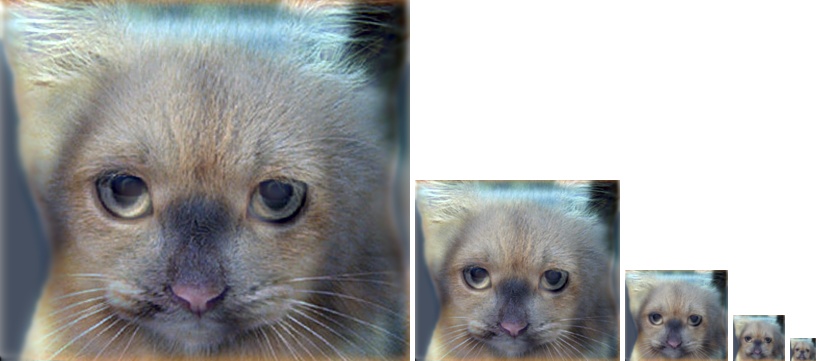
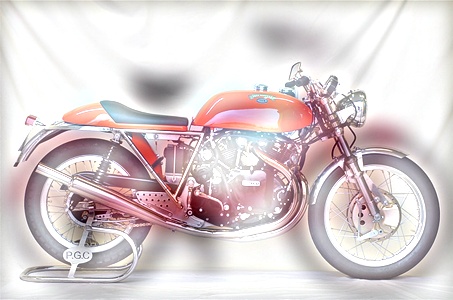
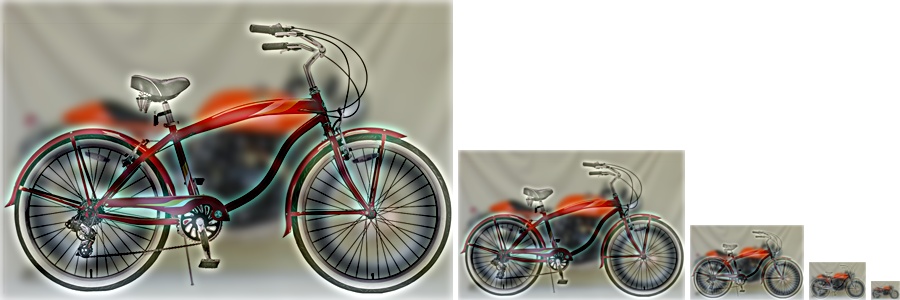
Example hybrid image
This project was on linear image filtering and the creation of hybrid images. For my appliation of the image filter, I went with a relatively simple approach of looping over every pixel within each color channel of the input image, and then calculating the filtered values for that location. After calculating the value for all pixels of a color channel, I then added that matrix to the final output image as a new color channel. The result was an RGB image with the filter applied, with the same results as Matlab's built in imfilter function. More details about the code are discussed below.
Algorithm Explanation
My algorithm for applying a filter to an image can be split into three basic steps:
- Calculate necessary padding
- Loop over each channel and apply padding
- Filter the channel and add to the final output
Calculating Padding
In order to properly apply a filter to the image, we must first pad the image with zeros so that we don't try to apply the filter on out of bounds indices. To do this, we simply take the size of the input filter, then based on the rows and columns, we divide each by two and take the floor of this value to get the padding needed in the y-direction (rows) and in the x-direction (columns). This padding is then used within our next steps to pad the array.
% Get size of filter to calculate padding
[f_rows, f_cols] = size(filter);
rowPad = floor(f_rows/2);
colPad = floor(f_cols/2);
Looping Over Channels and Padding
Next, since we are working with RGB images, we want to loop over all three channels and filter them separately. The code is written in a generic way to handle images of different numbers of channels as well. We simply extract the current channel from the image based on our index, and then use the built in MatLab function "padarray" to apply to correct amount of row and column padding to the image. The 'channel' variable is now our image we can apply the filter to.
% Create a pre-sized output array to hold final output
[img_rows, img_cols, channels] = size(image);
output = zeros(img_rows, img_cols, channels);

% Loop over the image channels
for i=1:1:channels
    % Get the current color channel and pad the array with 0's
    filt_channel = image(:,:,i);
    channel = padarray(filt_channel, [rowPad, colPad]);
Filtering the Channel and Adding to Output
The final step is to simply loop over each pixel of the image (only those inside of our newly added padding), and apply the filter at that location. For this part, I decided to use MatLab's element-wise multiplication in order to try and speed things up and to make the code a little bit cleaner as well. This allows me to slice out a matrix of the same size as our filter from the current channel based on our padding size and then perform element-wise multiplication rather than creating another double loop. The result of the ".*" multiplier is another matrix, so we then have to sum up all of the elements to get the final values of the pixel. A double sum is used because MatLab first adds within each column or row, so applying it twice allows all values to be added up.
% Make sure we loop over correct range
rows = img_rows + rowPad;
cols = img_cols + colPad;

% Loop over the inner image pixels
for j=1+rowPad:1:rows
    for k=1+colPad:1:cols
        % Compute an element-wise multiplication and store in our
        % filtered image at the correct pixel location
        val = sum(sum(filter .* channel(j-rowPad:j+rowPad,k-colPad:k+colPad)));
        filt_channel(j-rowPad, k-colPad) = val;
    end
end

% Set the correpsonding channel of our output to the filtered image
output(:,:,i) = filt_channel;
Results
To create the hybrid images, I first applied the Gaussian filter to the first image to remove high frequencies. Next, we apply the same filter to the second image, except we then subtract this new image from the original in order to get an image of the high frequencies. We can then add these two images together in order to get the final hybrid image.
cutoff_frequency = 8;
filter = fspecial('Gaussian', cutoff_frequency*4+1, cutoff_frequency);

low_frequencies = my_imfilter(image1, filter);

high_frequencies = image2 - my_imfilter(image2, filter);

hybrid_image = low_frequencies + high_frequencies;
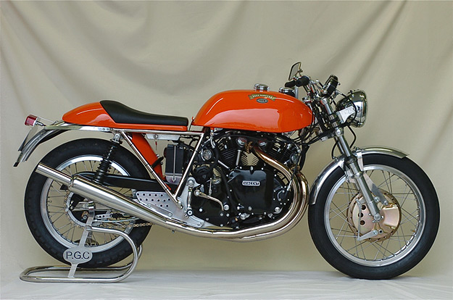
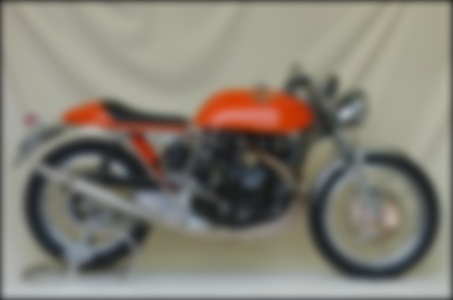
I attempted to tune the cutoff frequency as best I could for each image pair. I experimented with many different values for each to try and get the best effect. Some of the image pairs worked better than others as you will be able to see below. I did notice that you want to tune in certain directions based on the nature of the image. Some of the images, such as the bike, had a lot of sharp contrast and thus a lot of high frequencies. I had to tune the cutoff frequency higher in order to remove more of these high frequencies to get the best image. It was similar for images with a less high frequencies. I kept the cutoff frequency lower so that the image didn't turn into a complete blurred blob.
To save some space, not every combination of images is shown below. Additional results can be seen on another page linked here. I also attempted to create my own image pairs for new hybrid images. Which can be seen at the bottom of the page.
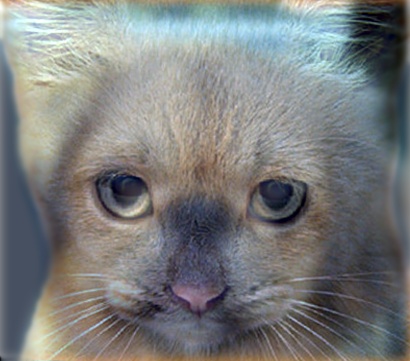
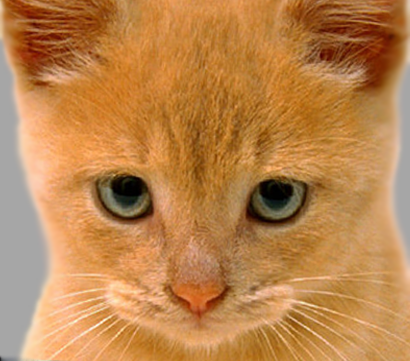
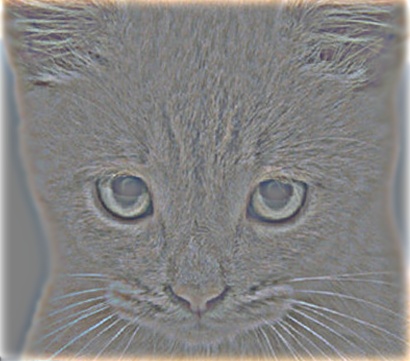
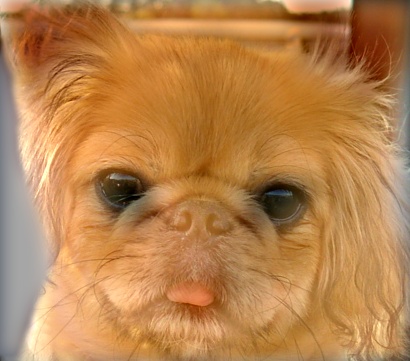
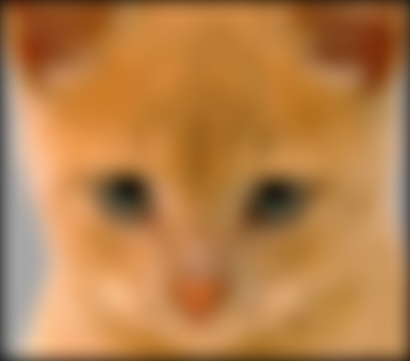
Cat and Dog
| Cutoff: 6 |
|---|


|
| Cutoff: 10 |
|---|

|

Bike and Motorcycle
| Cutoff: 10 |
|---|
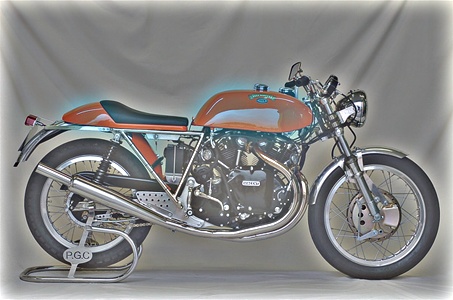
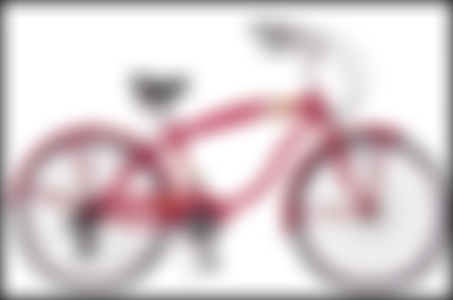
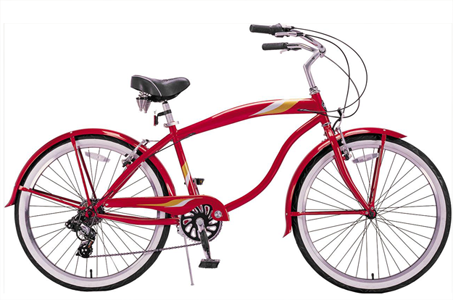
|
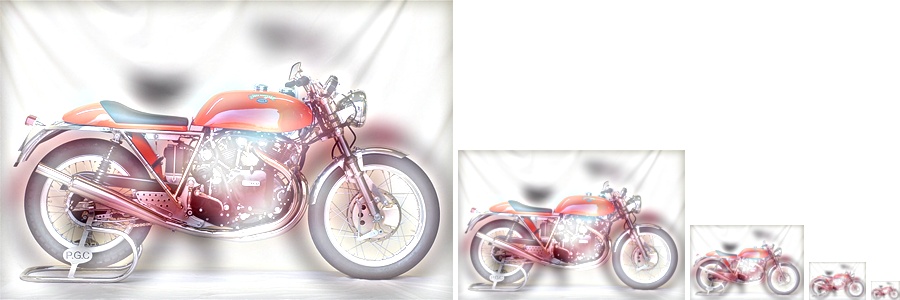
| Cutoff: 4.5 |
|---|
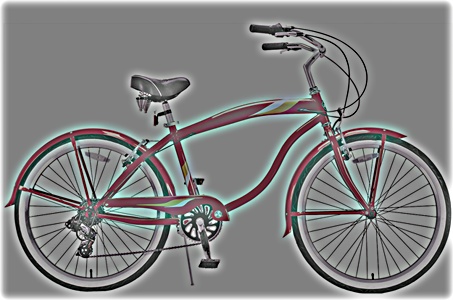
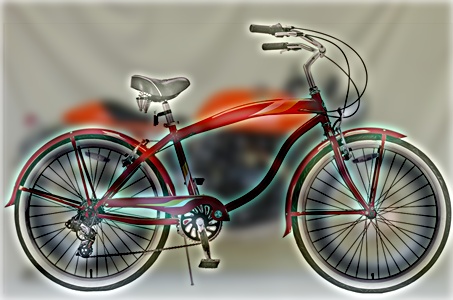
|
Experimenting with New Images
Getting two images to align and work well for "hybridization" was a little trickier than I expected. Sometimes, no matter what cutoff I used, the effect really only made the transition at a very small resolution or at a large distance. However, I feel like I was able to get some decent results from using some images that I could manage to align well
Lion and Tiger
| Cutoff: 3.5 |
|---|
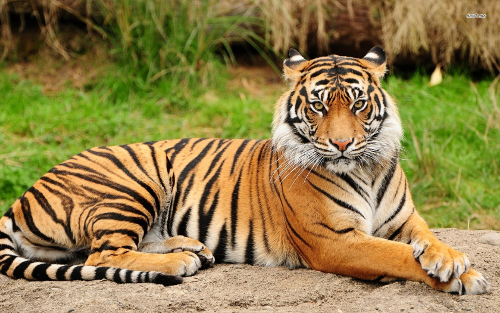

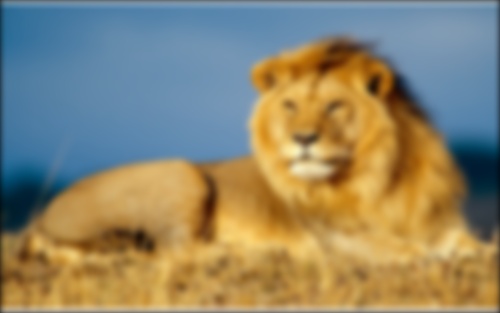

|

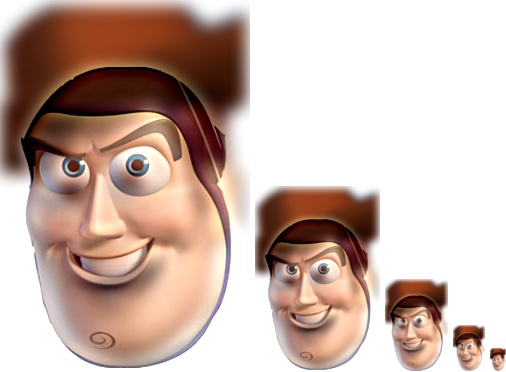
Buzz and Woody
| Cutoff: 5.5 |
|---|

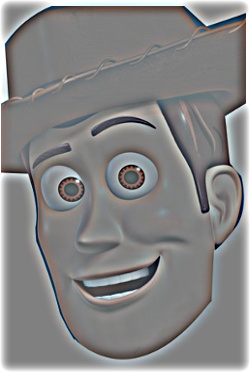


|
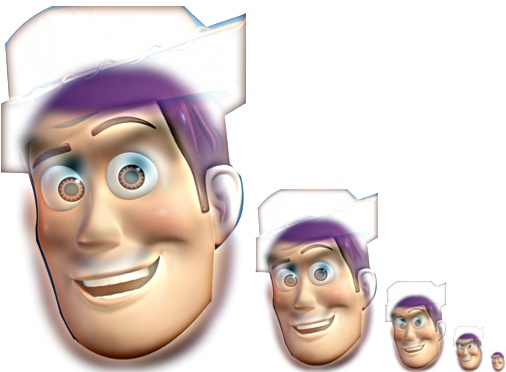
| Cutoff: 8 |
|---|
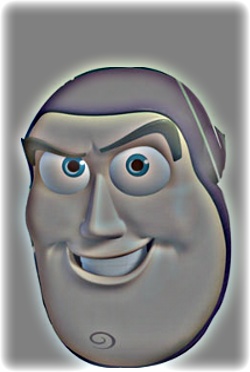
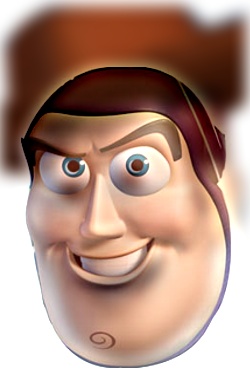

|
Filtering with Frequencies
I also decided to try to implement the algorithm presented in class for arbitrarily sized filters and both grayscale and color images. I used the formula that links convolution and Fourier Transforms to apply a filter to each channel of an image separately. This produced results essentially identical to my other implementation of my_imfilter. The speed of the filtering also seemed to be much faster, even though my dimensions for the fft2 were not powers of 2. Filtering went from seconds with my_imfilter to almost instant with fft. The code can be seen below.
% Get size of filter to calculate padding
[f_rows, f_cols] = size(filter);
rowPad = floor(f_rows/2);
colPad = floor(f_cols/2);

% Create a pre-sized output array to hold final output
[img_rows, img_cols, channels] = size(image);
r = img_rows + 2*rowPad;
c = img_cols + 2*colPad;
output = zeros(img_rows, img_cols, channels);

for i=1:1:channels

    channel = image(:,:,i);

    fft_mult = fft2(channel, r, c).* fft2(filter, r, c);

    inv_fft = ifft2(fft_mult);
    inv_fft = inv_fft(1+rowPad:img_rows+rowPad, 1+colPad:img_cols+colPad);
    % Set the corresponding channel of our output to the filtered image
    output(:,:,i) = inv_fft;
end
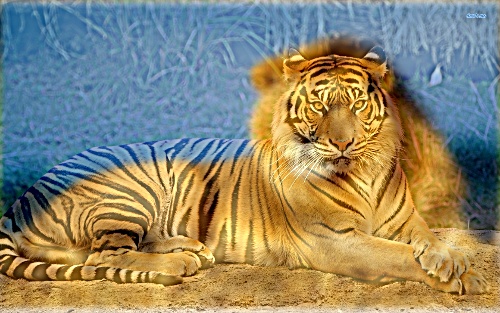
Results from Frequency Filtering
The results from filtering in the Frequency Domain were basically identical to the results from my_imfilter. For example, using freq_filter instead of my_imfilter I was able to produce the hybrid images below
Lion and Tiger
| Cutoff: 3.5 |
|---|
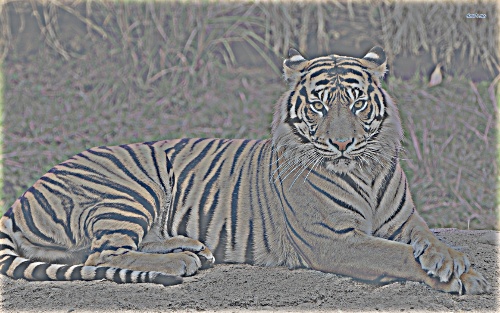


|