Project 5 / Face Detection with a Sliding Window
Project 5 is a very interesting one in that it brings together a lot of what we have learned over the semester into a very useful application: face detection. Being able to detect a face in an image can be useful for a variety of reasons. One is for applications like Facebook which like to detect faces in order to make it easier for the images to be tagged. Another may be to single out a criminal in a security photo. However you may want to detect faces, it is certainly useful, and this project encompasses the basics of doing it.
Face detection requires several steps. Like in previous projects, we need to create a feature that we will use to represent an image that is either a face or isn't, and we need to train a model based on several samples of faces and non-faces. Then, given an image that we want to detect faces in, we need to run a sliding window check, pulling features of equivalent size and type to those that we trained on, and pass those into our model. If the feature passes to a certain threshold, we call it a face, and otherwise we do not. I will detail exactly how I implemented all of these steps below.
Positive Features
Mining for positive features is a pretty simple process. We must extract photos that we know are of faces and of a given template size, and convert them to our feature type. Most of this was done for us this project, given that we were given a training set of about 6700 faces, sized 36x36 pixels. The feature we are using is a HoG feature, which is a similar but more sophisticated feature method than we have worked with so far in this class. HoG's accuracy is based on how big of a "cell" you want to use, and generally a smaller cell is better, but this also means there are more cells to process and thus can take longer. The implementation of creating a HoG feature was given to us in the project.
Negative Features
Mining negative features is also relatively simple, but is a little bit more complicated than positive features. For negative features, we are given various images that are known to not have faces in them, but they may not be of the size template that we need. Given this, we need to randomly select blocks from the image that are equal to our template size, and use those as negative examples. For my implementation, I chose to randomly select an image and then randomly select a portion of that image. I may have been able to get slightly better results if I ensured that all given images were used at least once, as my implementation doesn't guarantee that, but my results worked out pretty well without ensuring this as well. In total, I took 10000 samples of non-face features for each of my tests.
Training a Model
Now that we have example features that are both faces and non-faces, we need to train a model in order to be able to predict if a given image has faces. For this project, we are using a support vector machine(svm) model that will be able to label input features. For training, I assigned face features to have a label of 1 and non-face features to have a label of -1. Like in project 4, we need to assign a lambda value for the purposes of training precision. I chose to use 0.001, as that was the value I used in project 4 and it worked well for me there.
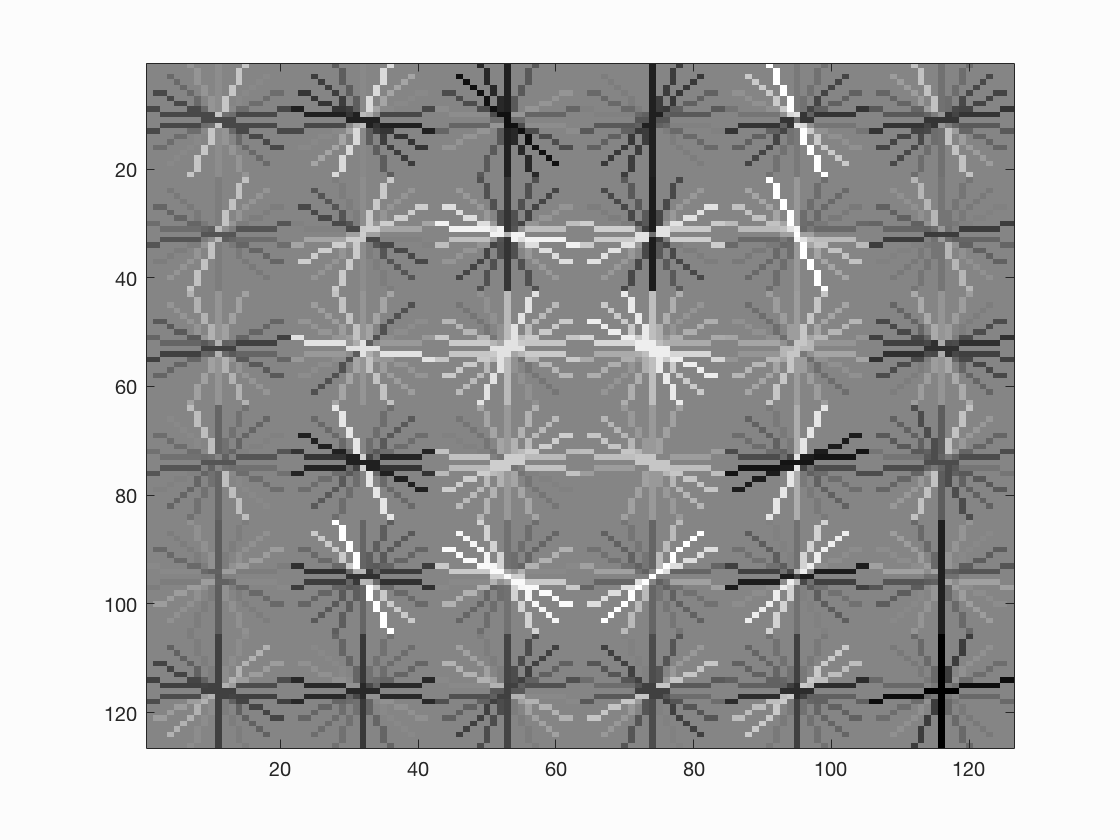
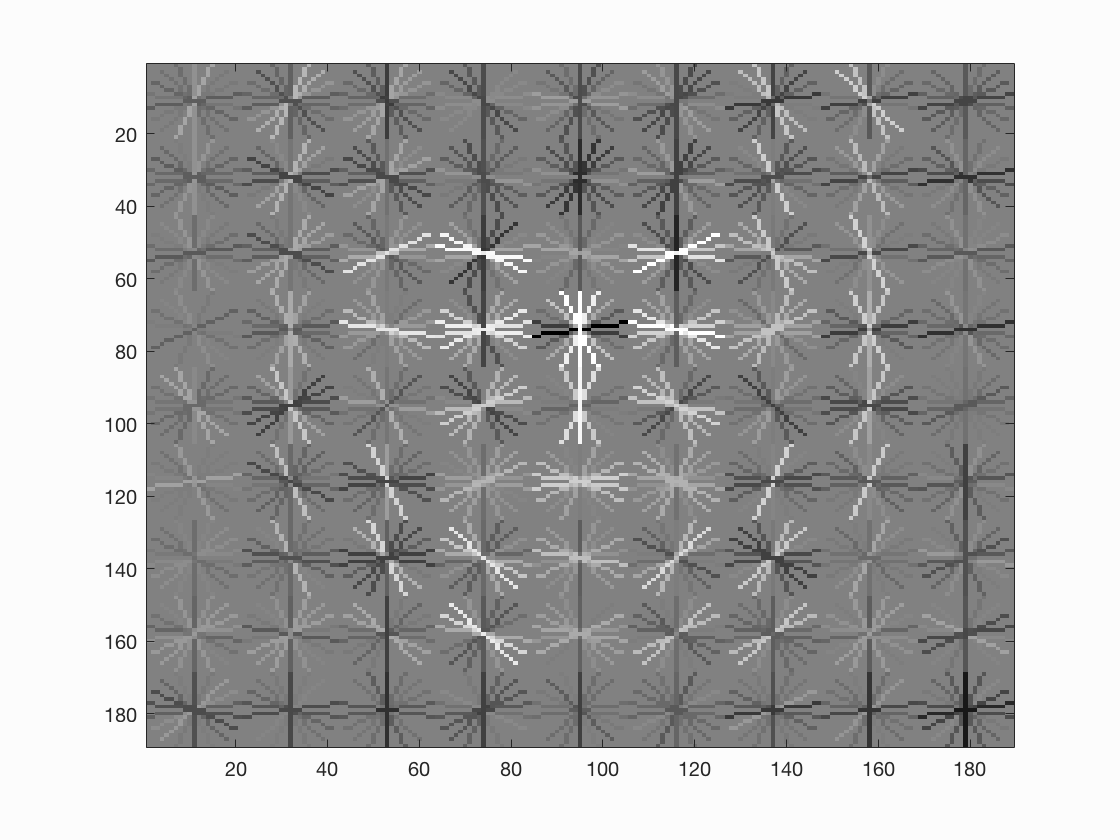
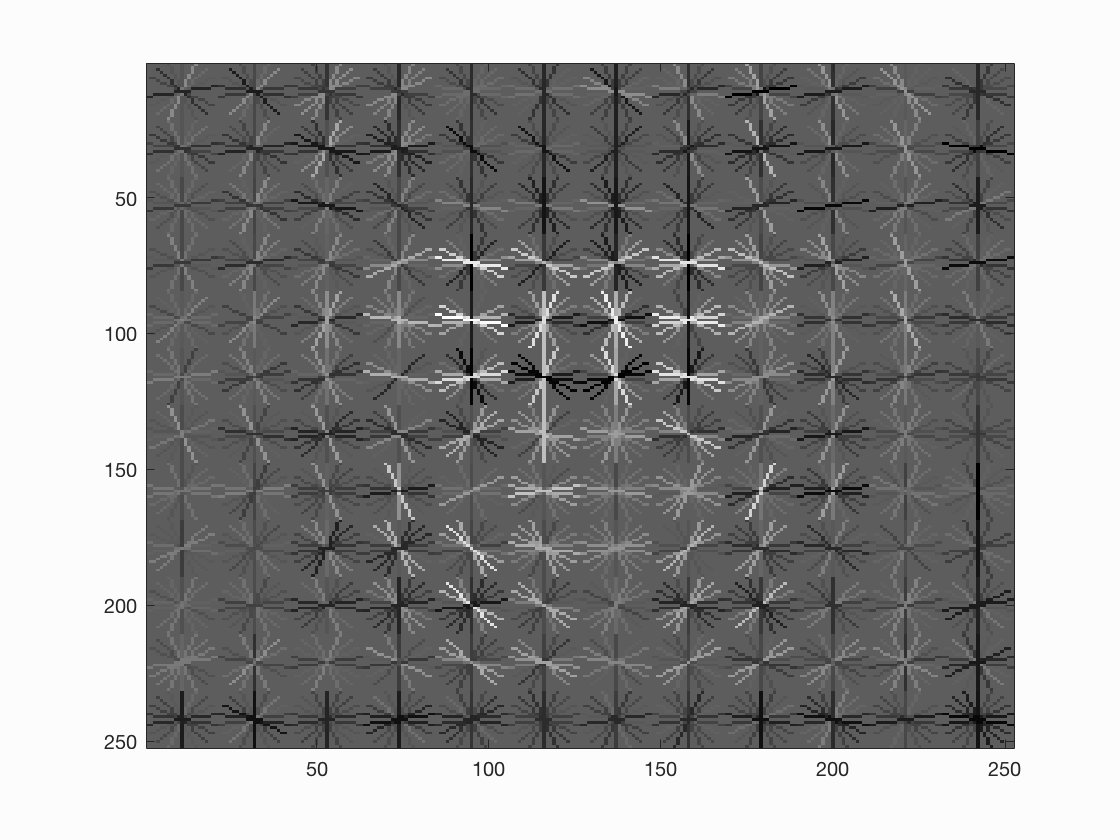
Below are some examples of the result of our trained model based on our HoG features. As you can see, all of them look kind of like they are curving into a face sort of shape, and also have some noticeable points at what would be the eyes of the face as well. This is exactly what we want as it means that our trainer is recognizing faces well. Notice also that a smaller step size causes more cells to be involved, which generally leads to a more accurate face.
 |
 |
 |
Detecting Faces Via a Sliding Window
The sliding window detector is the most complicated part of this pipeline that we were required to implement. Essentially, given an image that may have multiple faces or possibly non at all, we must create a HoG represenation of the entire image, iterate over all of the cells that exist in the HoG feature, grab pieces that are of the same size as our template, and then pass those features into our model from before. Then, we need to check if it matches a certain threshold. The lower the threshold, the more likely we are to find a match, but also the more likely we are to find false positives. Intuitively, a threshold of 0 makes the most sense (anything above 0 would be positive and thus have a higher chance of being a face than anything negative) but in practice I used a threshold of -0.1 in order to try to achieve better accuracy precision at the unfortunate cost of having more false positives.
There is also the consideration that certain images may have faces that encompass a space larger than our given template of 36x36 pixels, and the model won't recognize it as a face as a result. In order to avoid this, we want to repeat the above process for several different scales of the image. To do this, I resized each image to several different scales and then ran the same process for each. The scales I used were 0.5, 0.6, 0.7, 0.8, 0.9, and the default scale of 1, but I definitely saw some images in my tests that had larger faces that still weren't being recognized, so its possible I would have obtained better results with even smaller scales in addition to the ones I already had. When we do use this multiscale approach, we also need to include non-maximum suppression, which ensures that only the best boxes out of any that are overlapping by a majority amount are included in our final results.
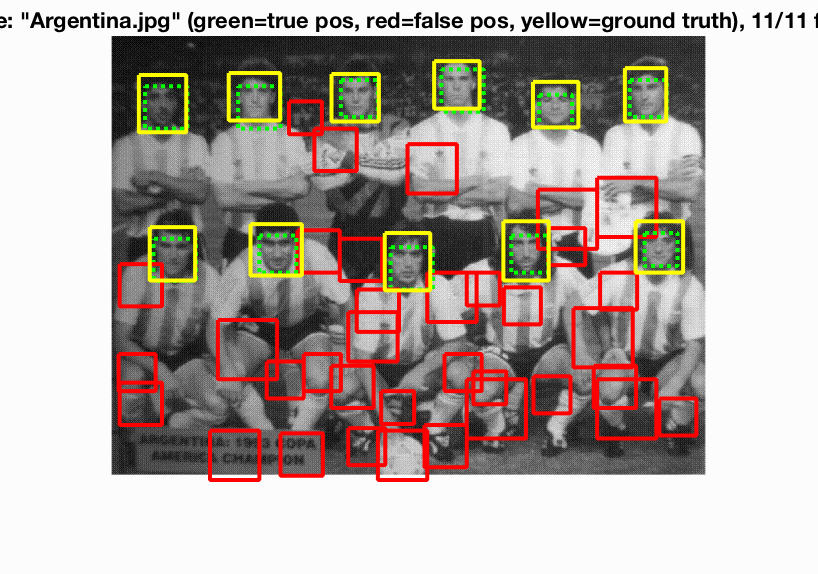
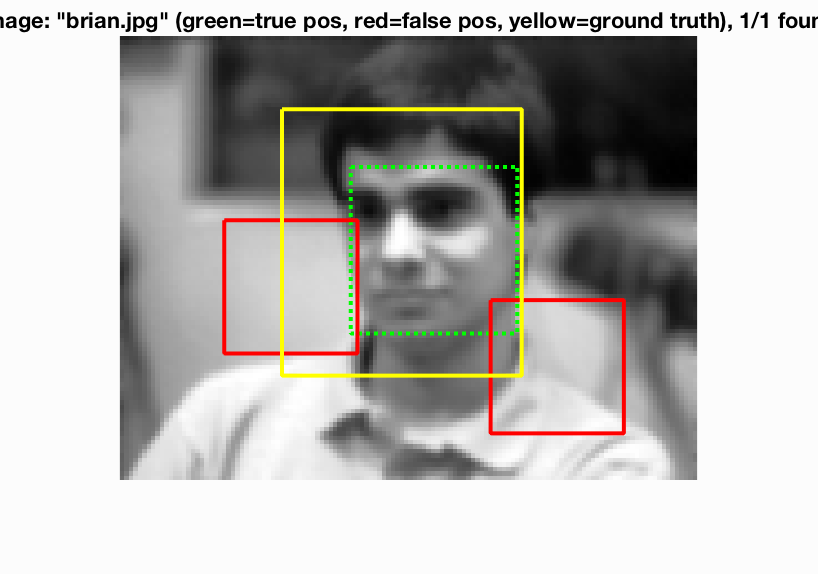
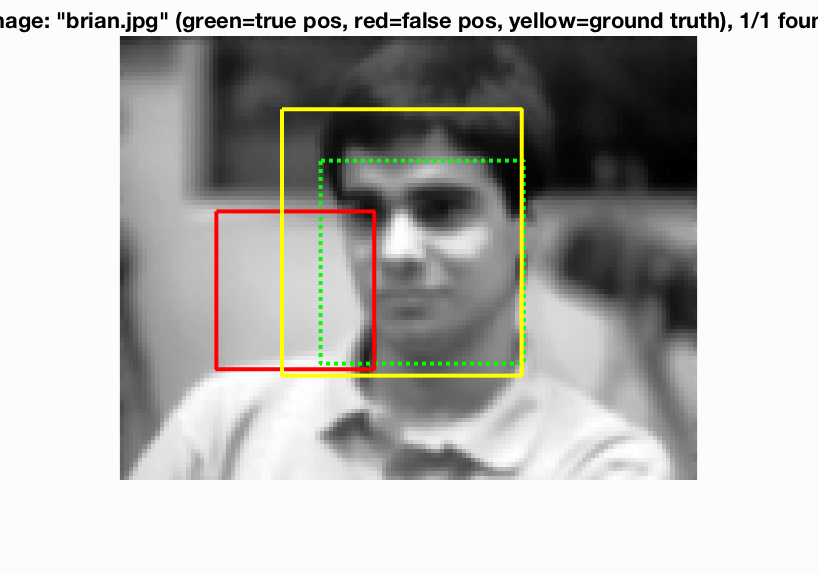
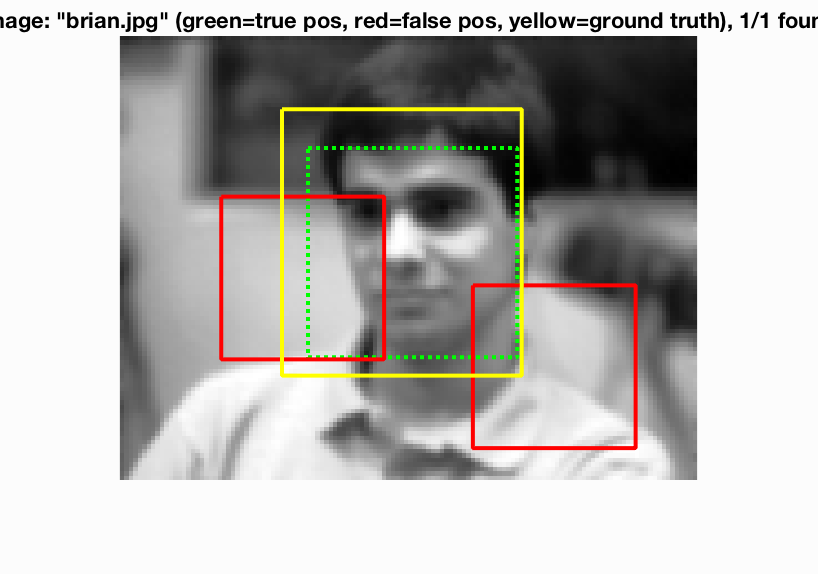
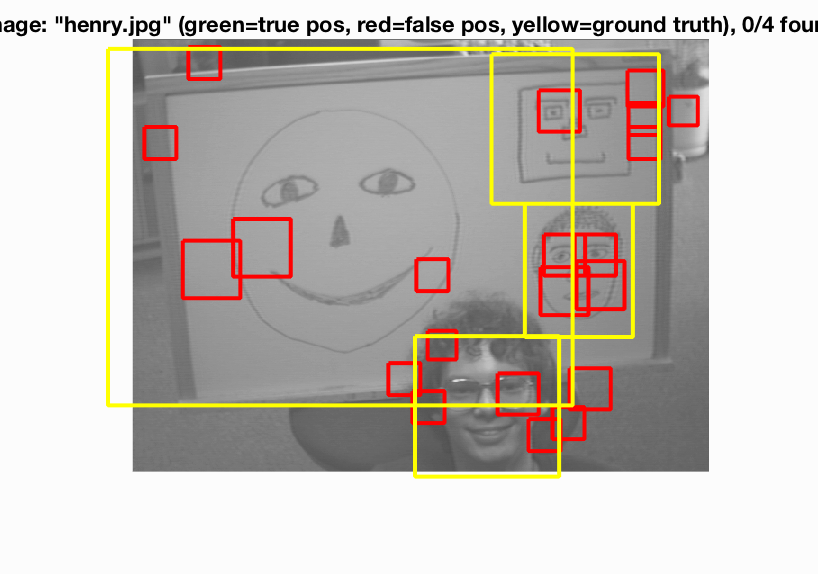
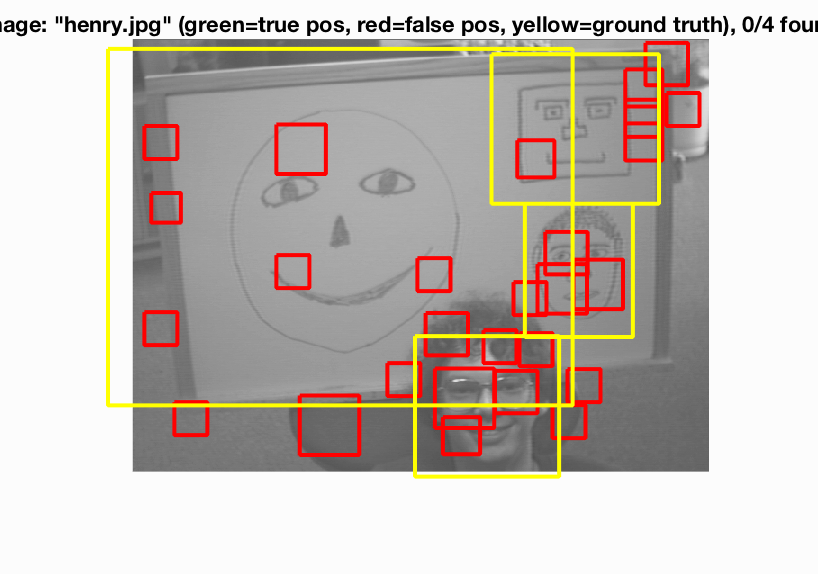
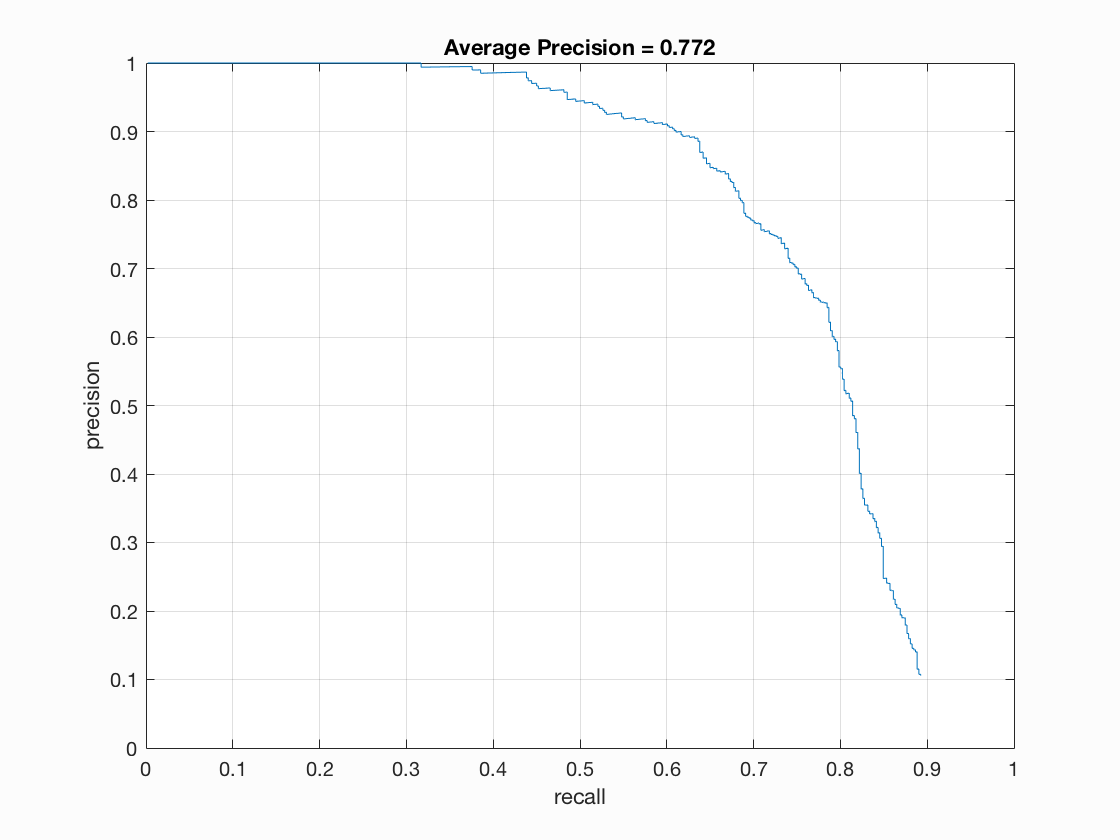
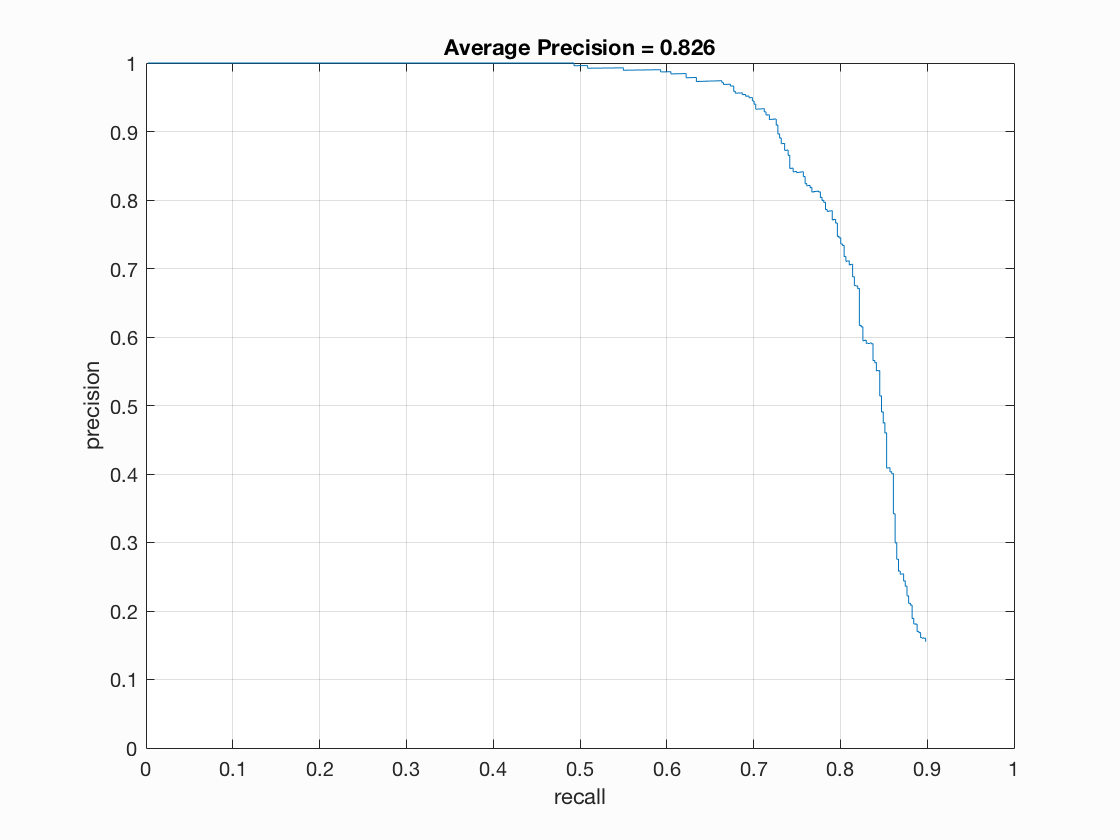
Below are some of my results on three of the images (two successes and one failure) in the test set, along with the accuracy precision for the various step sizes over all of the test images.
 |
 |
 |
 |
 |
 |
 |
 |
 |
 |
 |
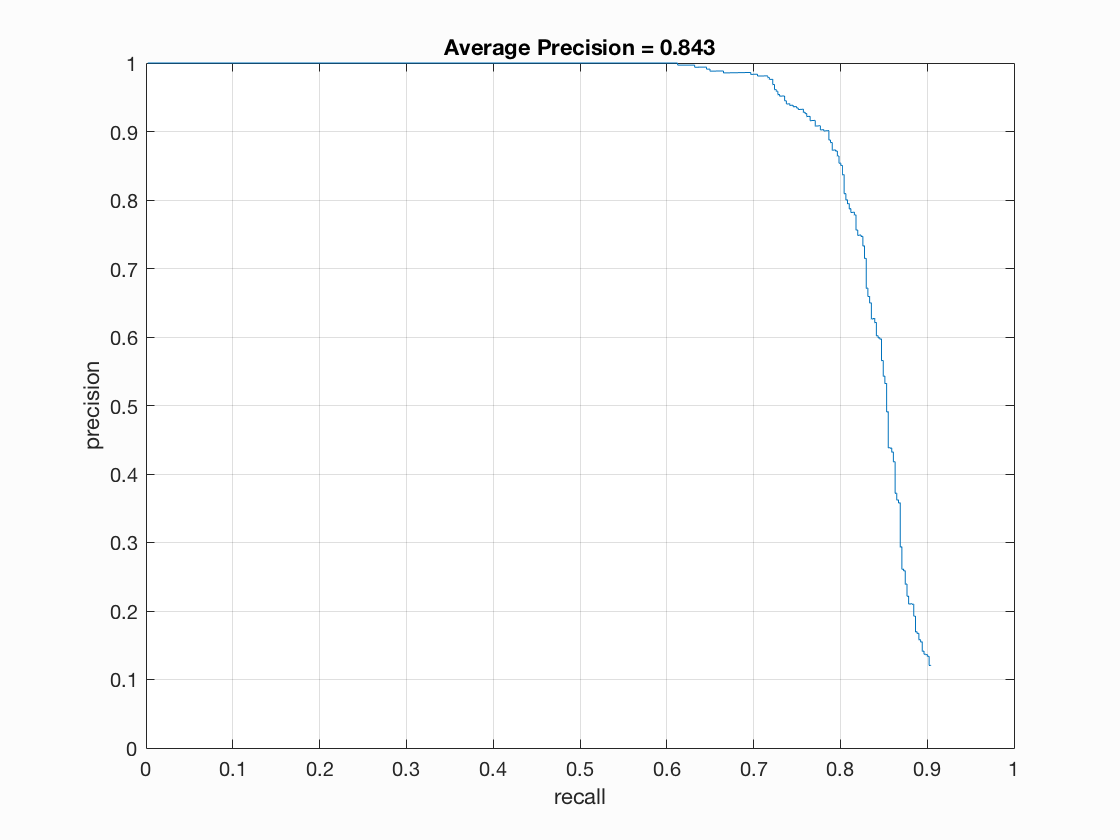 |
As you can see, the accuracy precision was fairly high, ranging from 77% to 84%, with significant increase correlating with the decrease in step size. The first two images found all the matches at each level, with the smallest step size interestingly enough having the most false positives. The last image is difficult to compute, as faces all appear to have been too big to have been caught given the scales I used. The same goes for the class picture example, which I tested with a step size of 3:
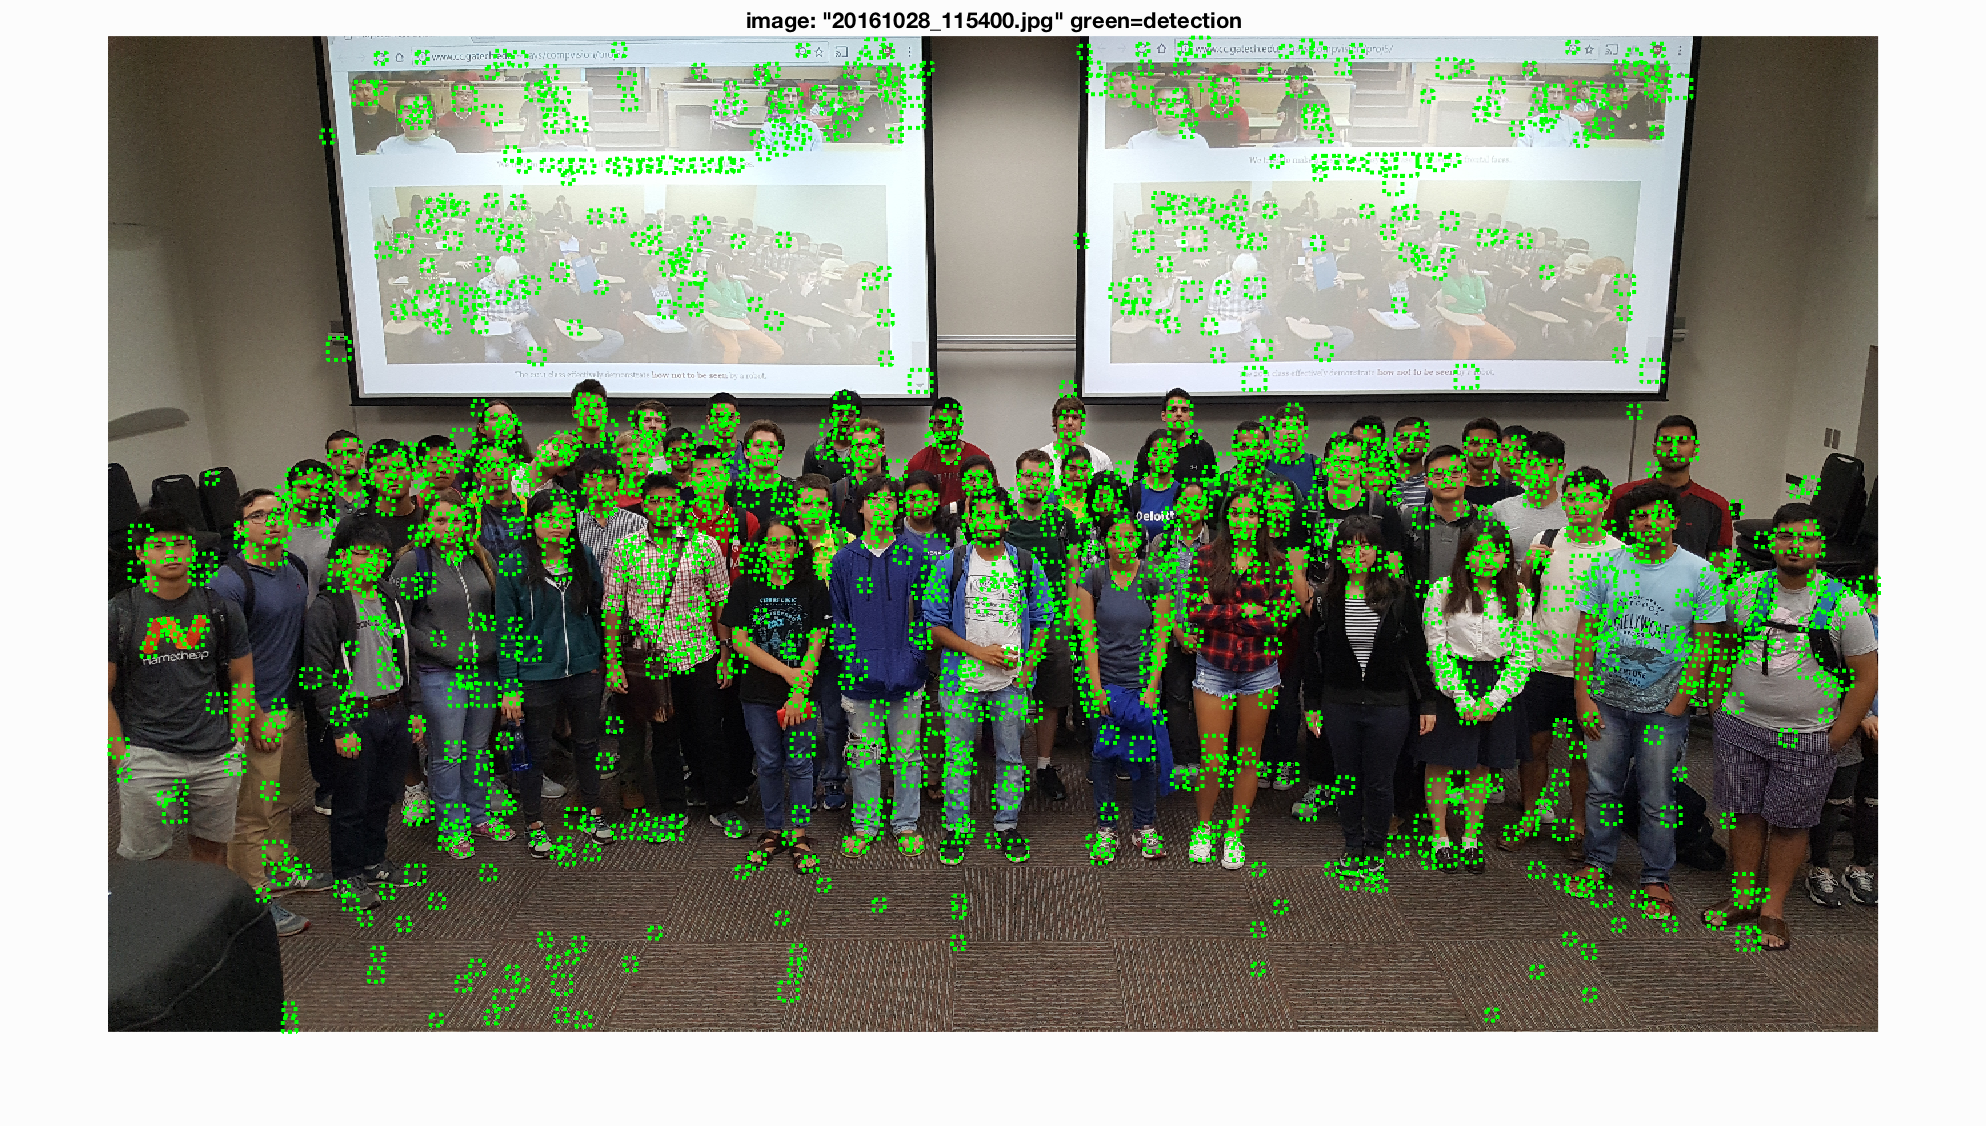
The class image does seem to stick mostly around the people (and the images of people on the projector), which is an indication that it is at least on the right track. Given these results, I believe that I could have created a better face detector overall by possibly testing more delicate thresholds in order to find the best balance of accuracy and fewest false positives. I also likely should have tested even more scales, going lower than 50% of the original image as I did. This would have helped me catch faces that took up a large portion of an image, or helped with high resolution photos as the class photo was.