Project 5 / Face Detection with a Sliding Window
|
|
| Detection of Image for Fall 2016 | |
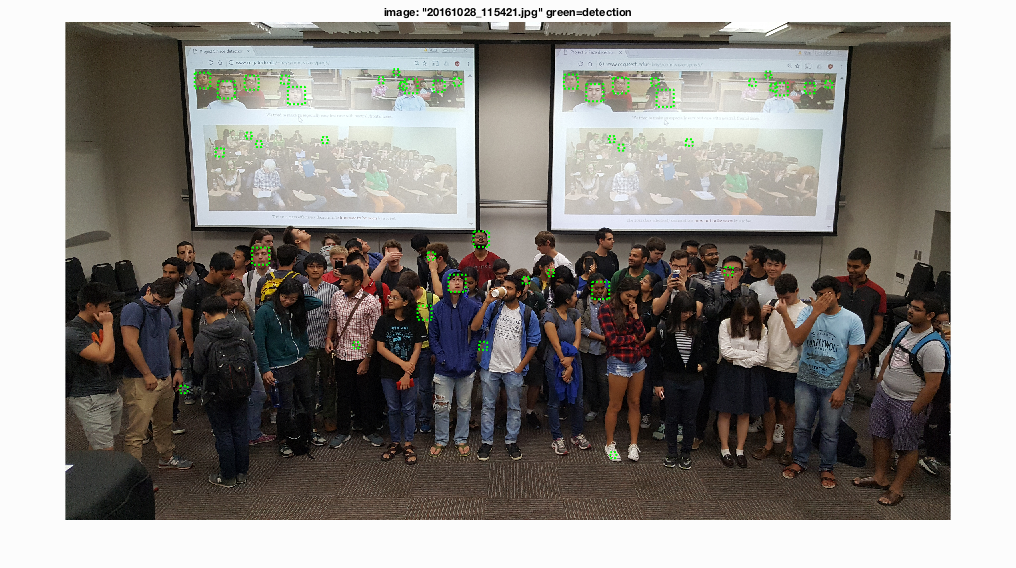
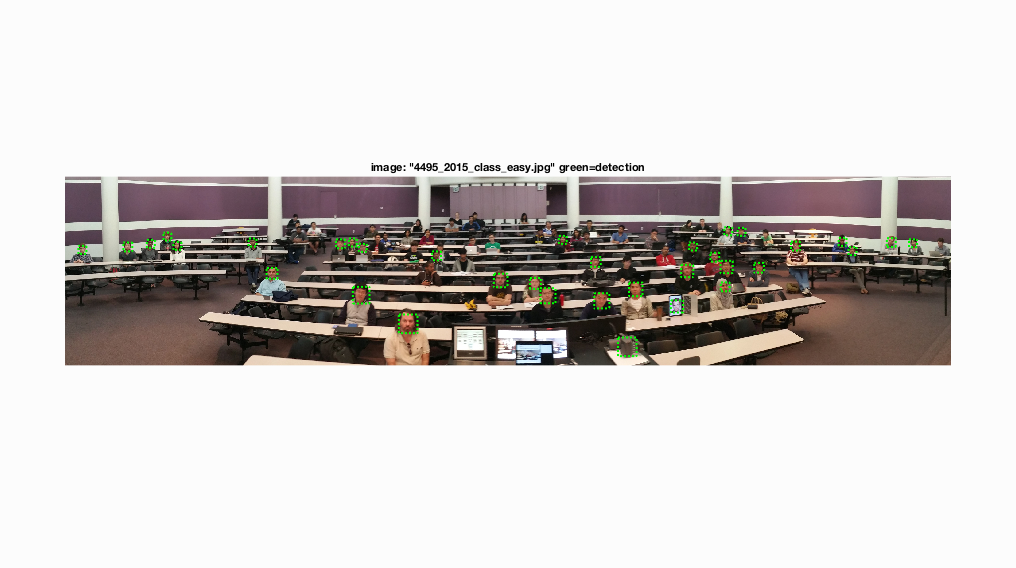
In this project, we do face detection based on the sliding window model. The training face image comes from Caltech Web Faces project, while the non-face training data comes from the SUN scene database. We use HOG representation as feature and mainly use the SVM for classification. We do testing and evaluate the detection results with CMU+MIT test set. We also test on the extra image taken in class. To get better result, we need to do multi-scale detection on the same image. For the extra credit part, I implement hard negative mining.
Basic Implementation
Get Positive feature
Since the size of training image for this part have the same size of 36*36, I calculate the HOG and reshape them directly. The result matrix will be treated as the positive features for face.
Get Random Negative feature
For different image in different scale, I will first calculate the HOG for the whole image. Then I will cut the HOG matrix into the required size and randomly pick some from the bucket.
Classifier Training
In this project, I use SVM as classifier to classify face and non-face. I directly make use of the vl_svmtrain for this project. I can pass the returned weight vector and bia to the latter steps. The lambda I use in the SVM training is 0.0001.
Detector
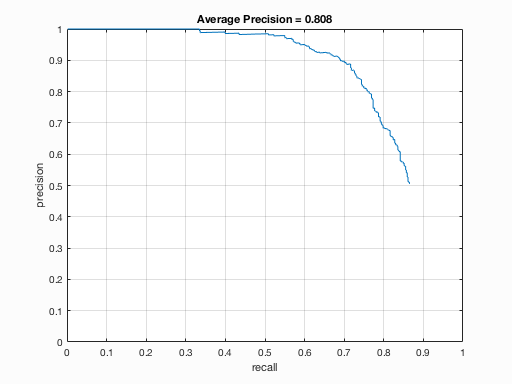
Given an test image, we will need to calculate the HOG for the whole image. Then we walk through all the possible HOG cell and pass the HOG feature of each small region to the SVM classifier. We will record all the confidences larger than the threshold and use non maximum suppression to figure out the optimistic face region. Detection on difference image scale is really important. Here shows the results with single-scale detection and multi-scale detection with the same configuration. In the multi-scale detection, the scales we use in the detection are as below
scales=[1 0.9 0.9^2 0.9^3 0.9^4 0.9^5 0.9^6 0.9^7 0.9^8 0.9^9 0.9^10];

|
|
| Precision Curve with single Scale Detection(hog_cell_size=6) | Precision Curve with Multi Scale Detection(hog_cell_size=6) |
Extra Credit
Get Hard Negative feature
To implement the hard negative feature, I make use of my code in the run_detector. To get better negative training set, I will ramdonly pick some HOG feature from the non face data set and pass them to the initial SVM classifier. Then I select num_samples of features with the highest confidences value for non-face detection. The selected HOG features will be treated as the hard negative features. Below shows the comparison between using random negative feature and hard negative feature. We can see that using hard negative feature can reduce the rate of false positive. And when the number of negative feature is limited or say not enough, hard negative feature can boost up the overall accuracy. The code for this part is in get_negative_features_hard.m.
|
|
| Precision Curve with random negative feature(hog_cell_size=6, #feature<=10000) | Precision Curve with hard negative feature(hog_cell_size=6, #feature<=10000) |
|
|
| Precision Curve with random negative feature(hog_cell_size=6, #feature<=4000) | Precision Curve with hard negative feature(hog_cell_size=6, #feature<=4000) |
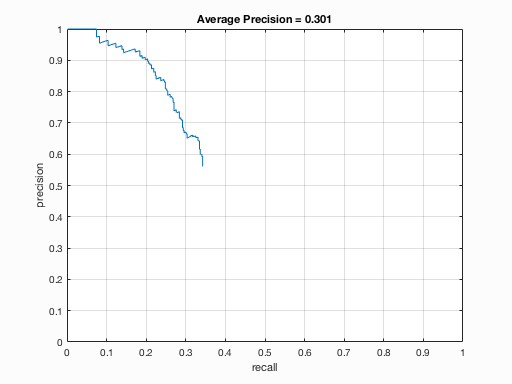
Result
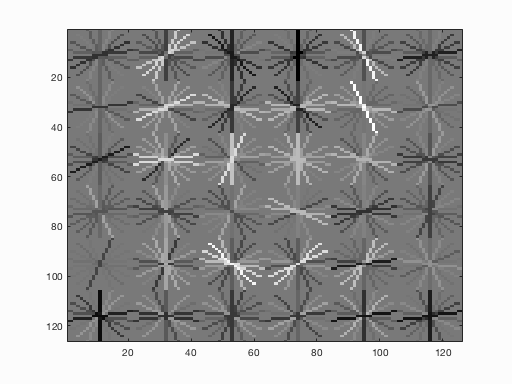
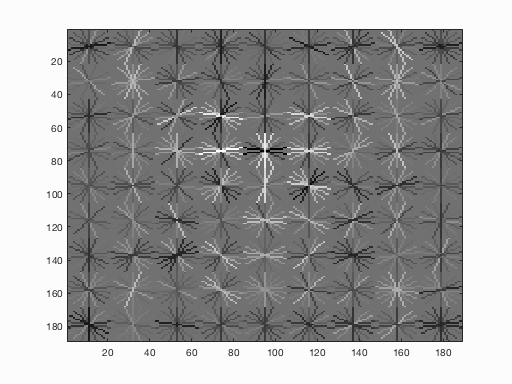
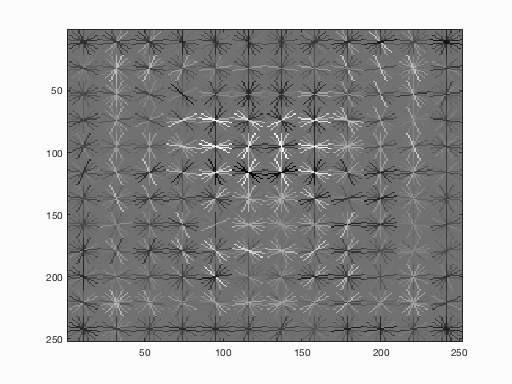
In fact, we can find that the HOG visualization looks like a human face.
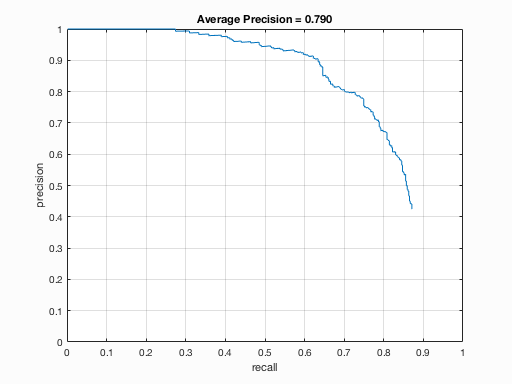
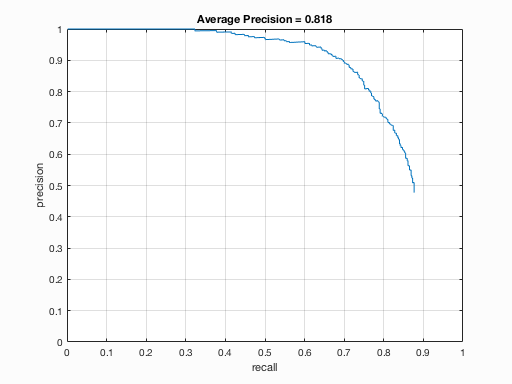
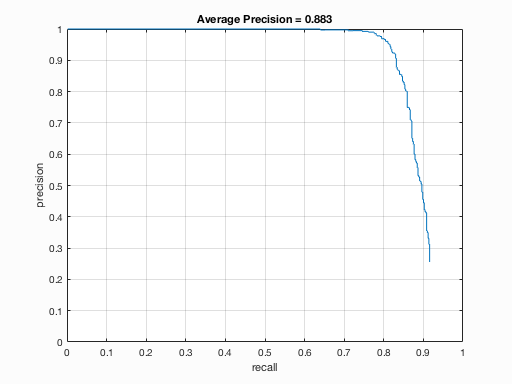
HOG_cell_size=6
I set the threshold to be 0.75 in the run_detector.m
|
|
| Face template HoG visualization | Precision Recall Curve |
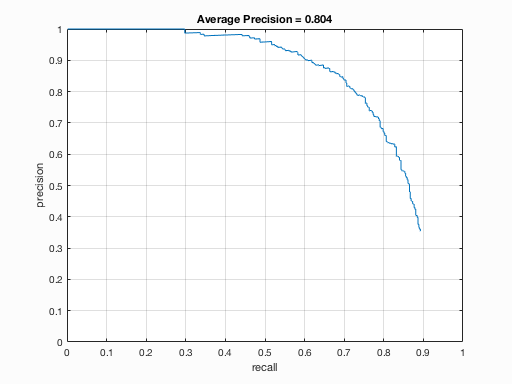
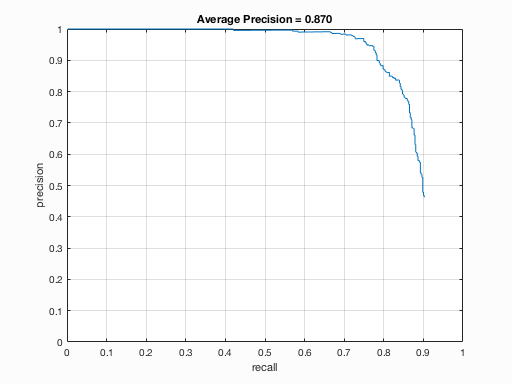
HOG_cell_size=4
I set the threshold to be 0.25 in the run_detector.m
|
|
| Face template HoG visualization | Precision Recall Curve |
HOG_cell_size=3
I set the threshold to be 0.25 in the run_detector.m
|
|
| Face template HoG visualization | Precision Recall Curve |
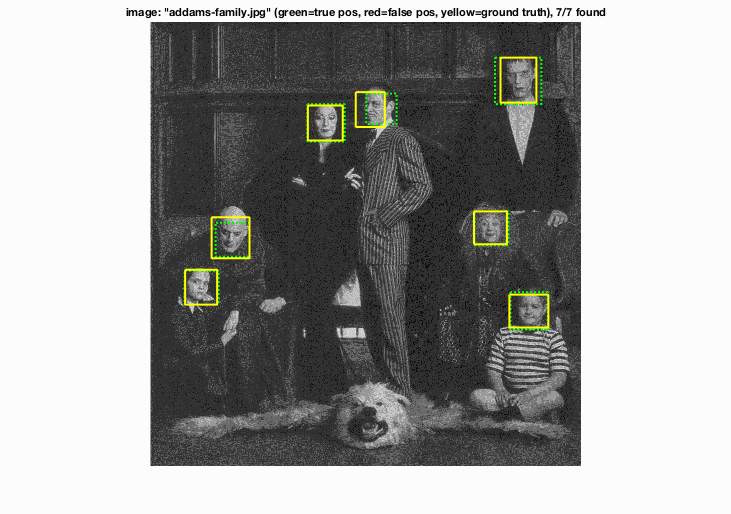
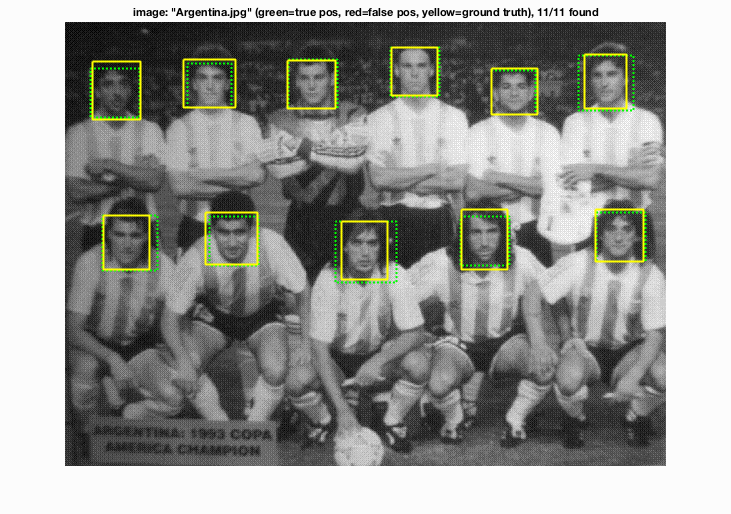
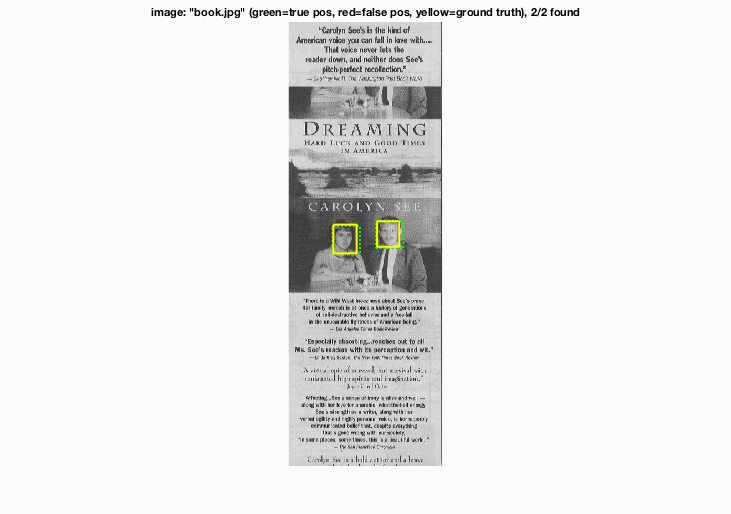
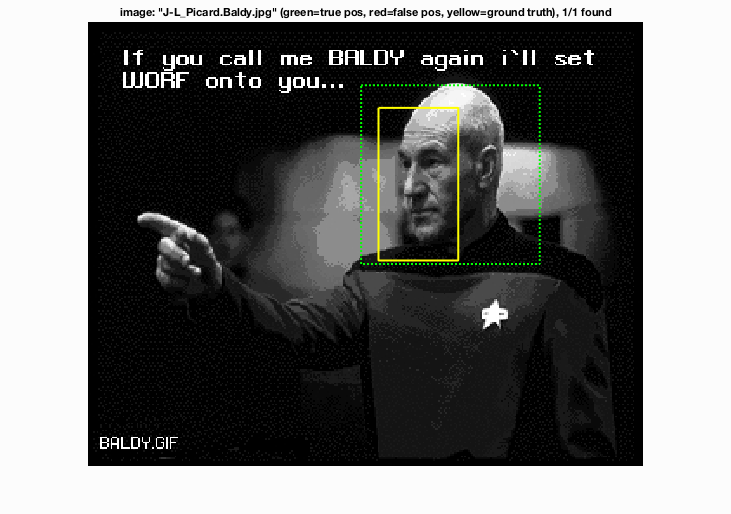
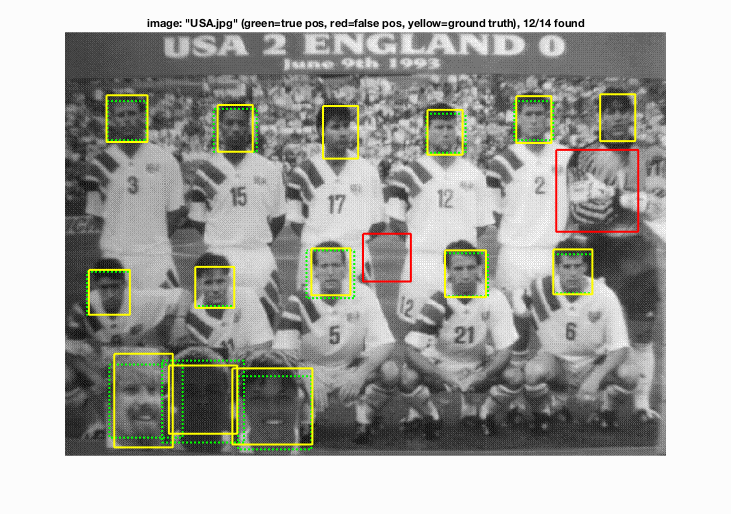
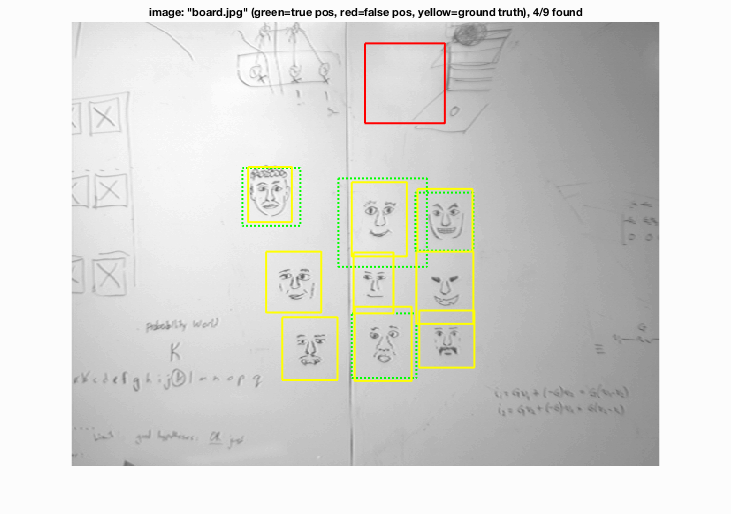
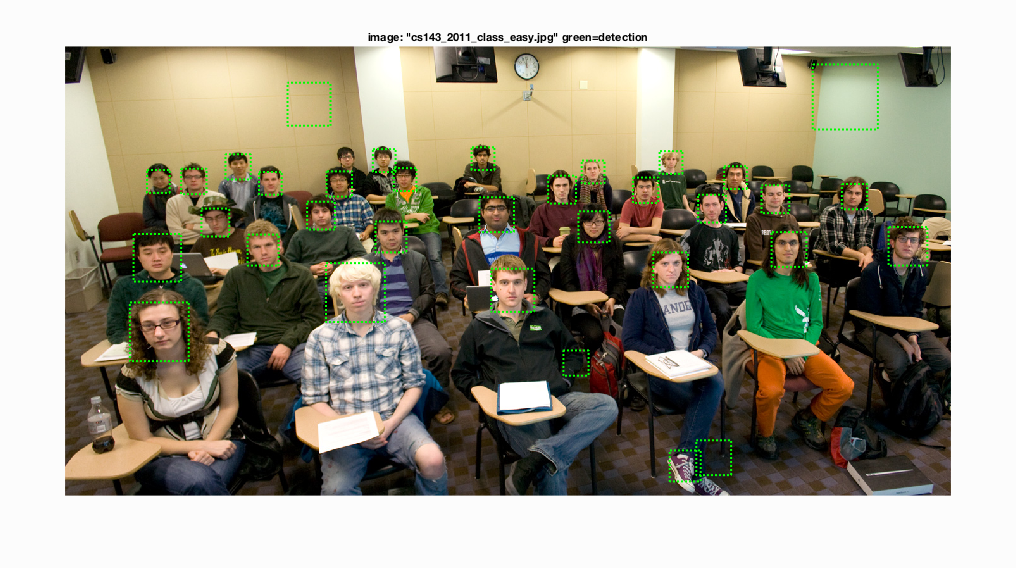
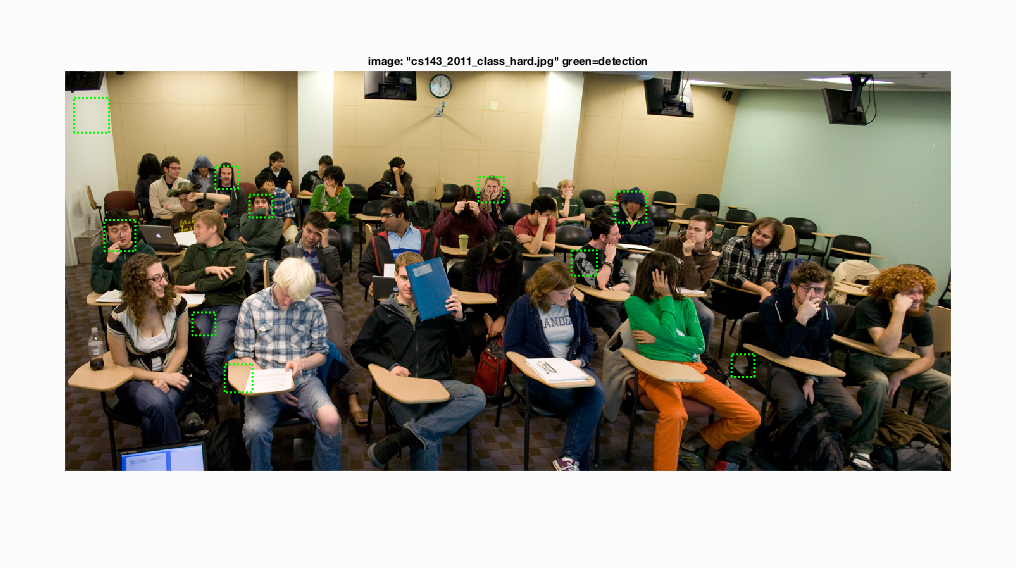
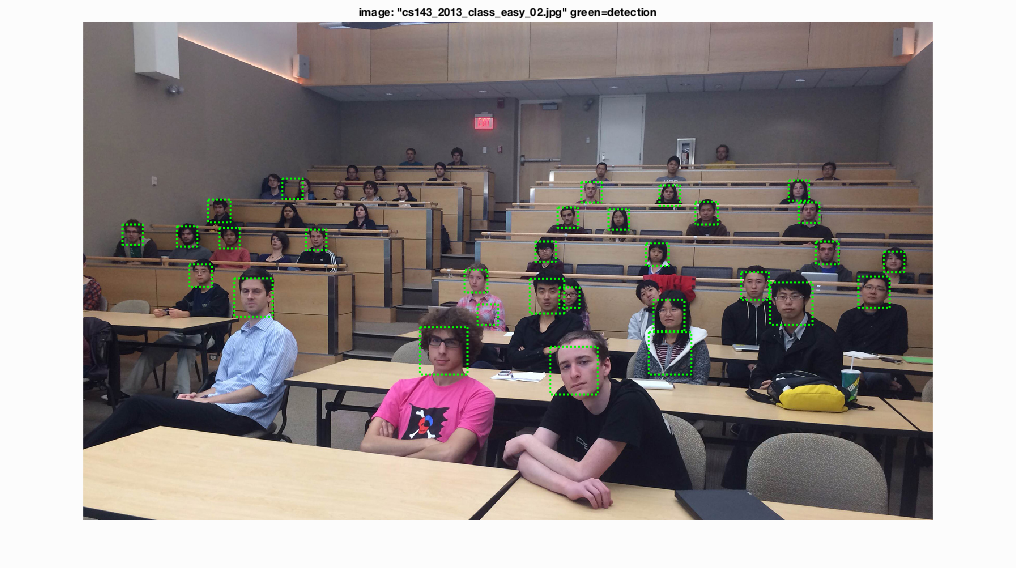
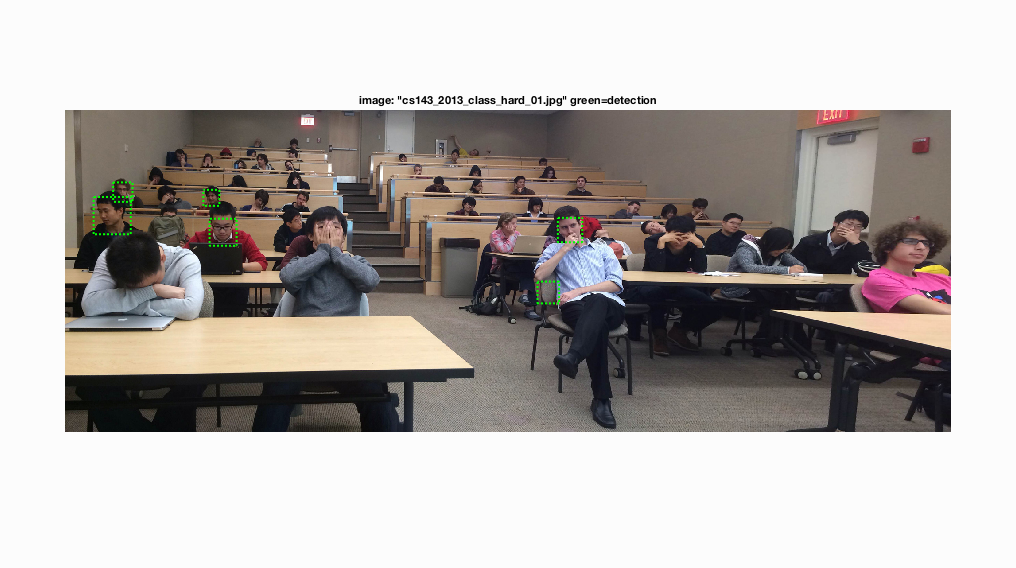
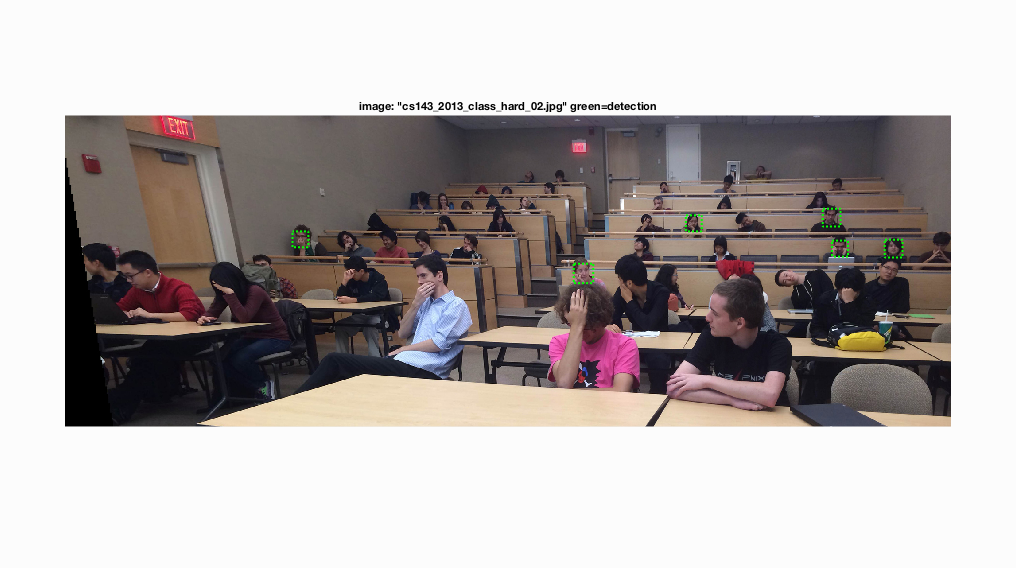
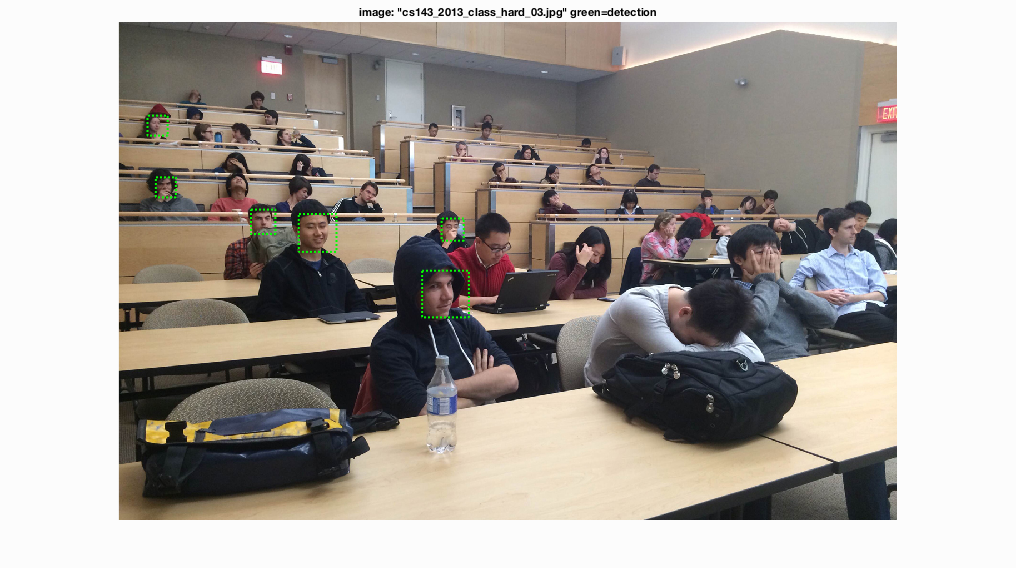
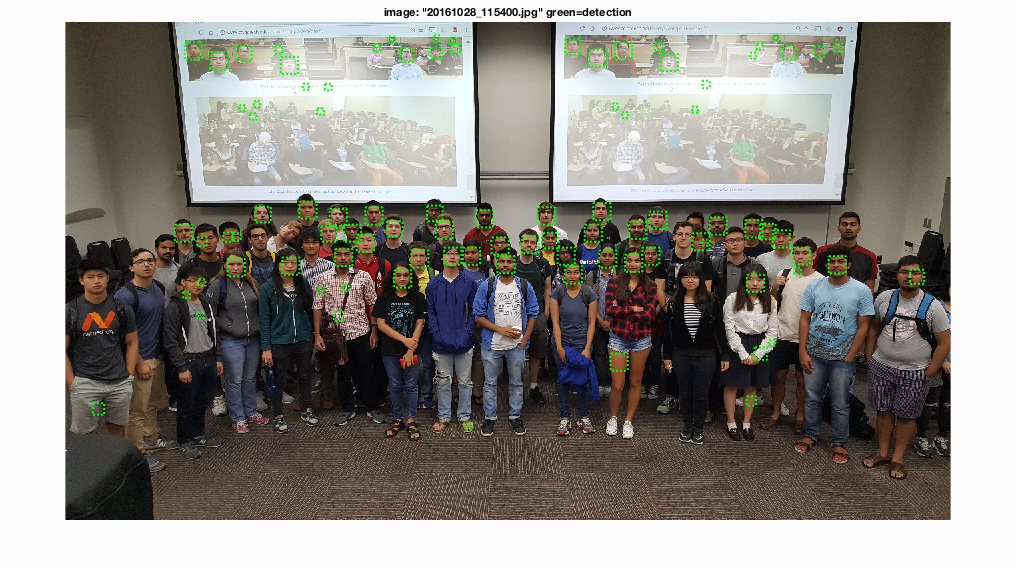
Here I show some of the face detection results