Project 5: Face detection with a sliding window
Single scale detector and the choice of regularizer of linear SVM
Positive features are obtained by converting Caltech_faces to HoG features. The parameters of HoG features are by default(template_size = 36, hog_cell_size=6).
Negative features are obtained by randomly picking 36*36 windows size on non-face images and compute the HoG features. There may be multiple windows chosen on a single non-face image, but the windows are not overlapping. Small images will create few negative features, and big images will create more. I try to uniformly produce negative features from all images.
In run_detector.m, for every testing image, first turn the whole image to HoG features and densely detect every 6*6 cells (i.e. the step size is 1 cell=6 px) in HoG features and use SVM parameter w and b to calculate the confidence. Reject those with confidence below -0.5 and do non max suppression.
The choice of regularizer (i.e. LAMBDA in VL_SVMTRAIN(X, Y, LAMBDA)) controls the bias in the model. I implemented single scale detector and tried several lamdas, the training accuracy and average precision on testing data are reported as follows.
| LAMDA | Training Accuracy | Average Precision on testing images |
|---|---|---|
| 0.1 | 0.990 | 0.317 |
| 0.01 | 0.996 | 0.366 |
| 0.001 | 0.999 | 0.370 |
| 0.0001 | 0.999 | 0.383 |
| 0.00001 | 0.999 | 0.386 |
| 0.000001 | 1.000 | 0.388 |
In the final model, I chose lamda = 0.000001.
Multi scale detector
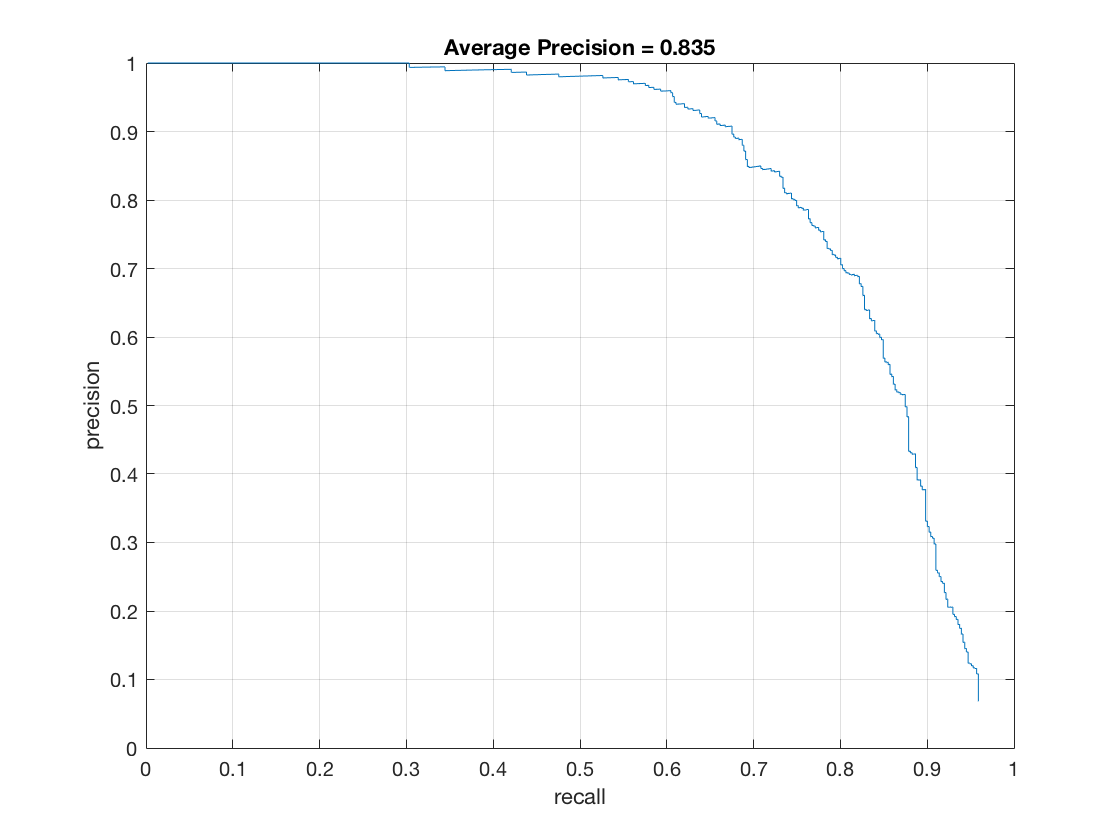
Next, I extend run_detector.m to multi scale. The scale is [1, 0.9, 0.8, 0.7, 0.6, 0.5, 0.4, 0.3]. The for loop will run detector on these scales. For each scale, first resize the image and do exactly as single scale. The only difference is when calculating bounding boxes, we need to transform back to the coordinates in the original image.The average precision is shown below.
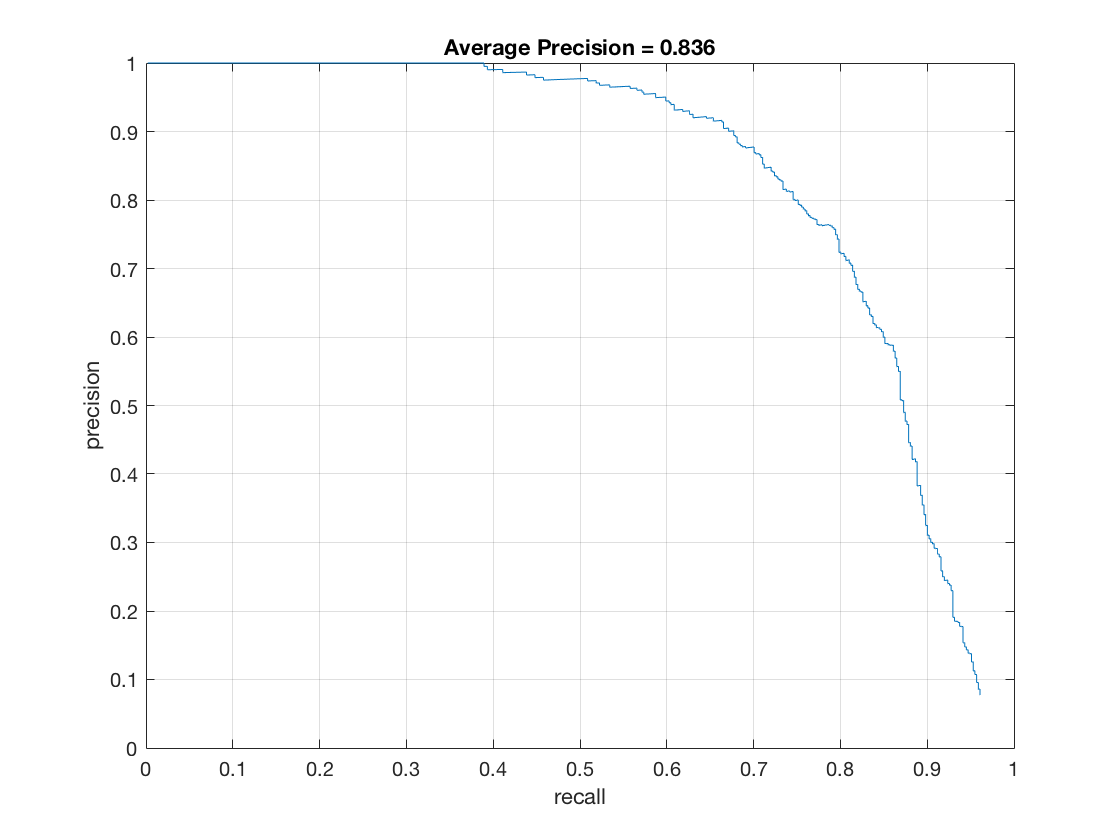
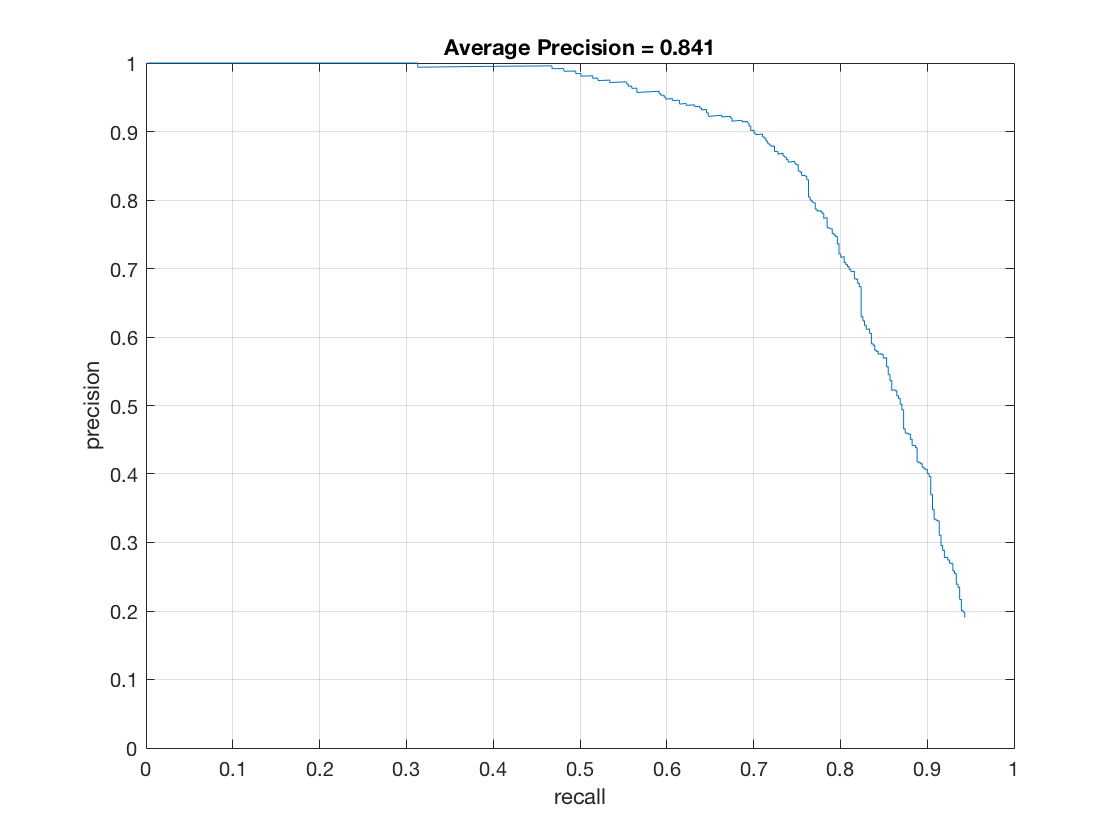
Reduce hog_cell_size will achieve higher average precision.
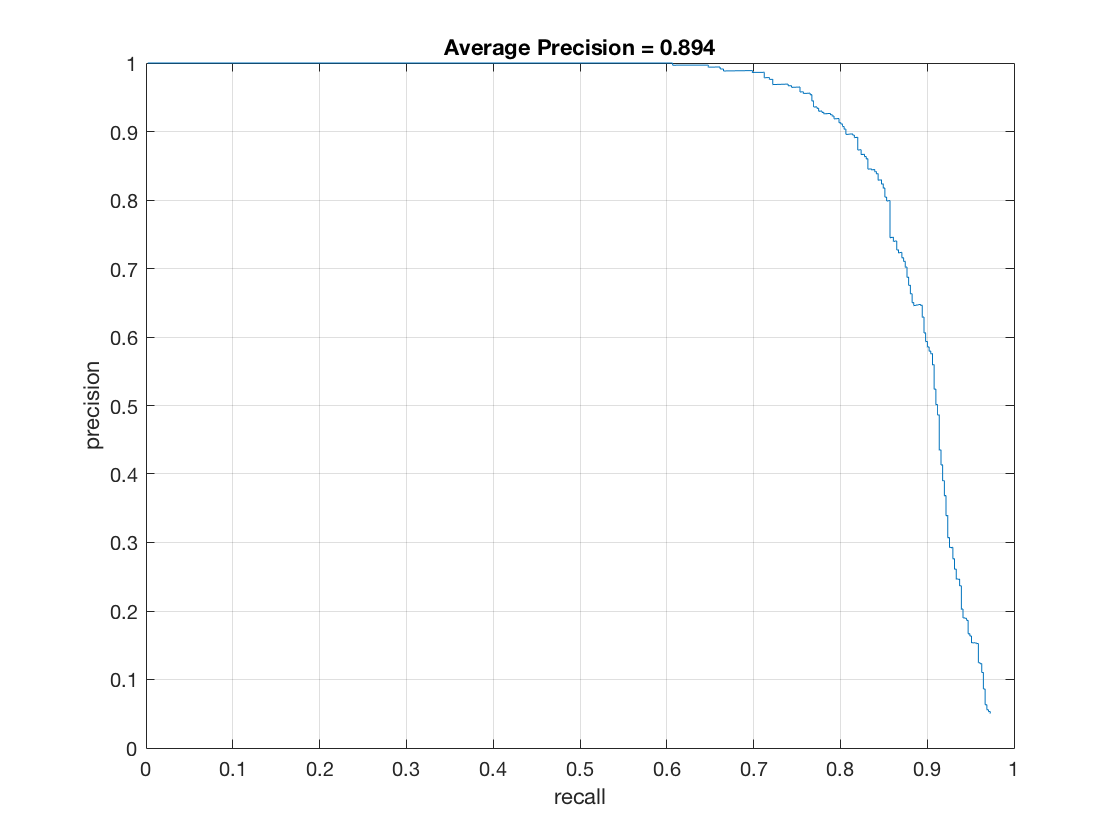
The final result is hog_cell_size=3, average precision is 89.8%
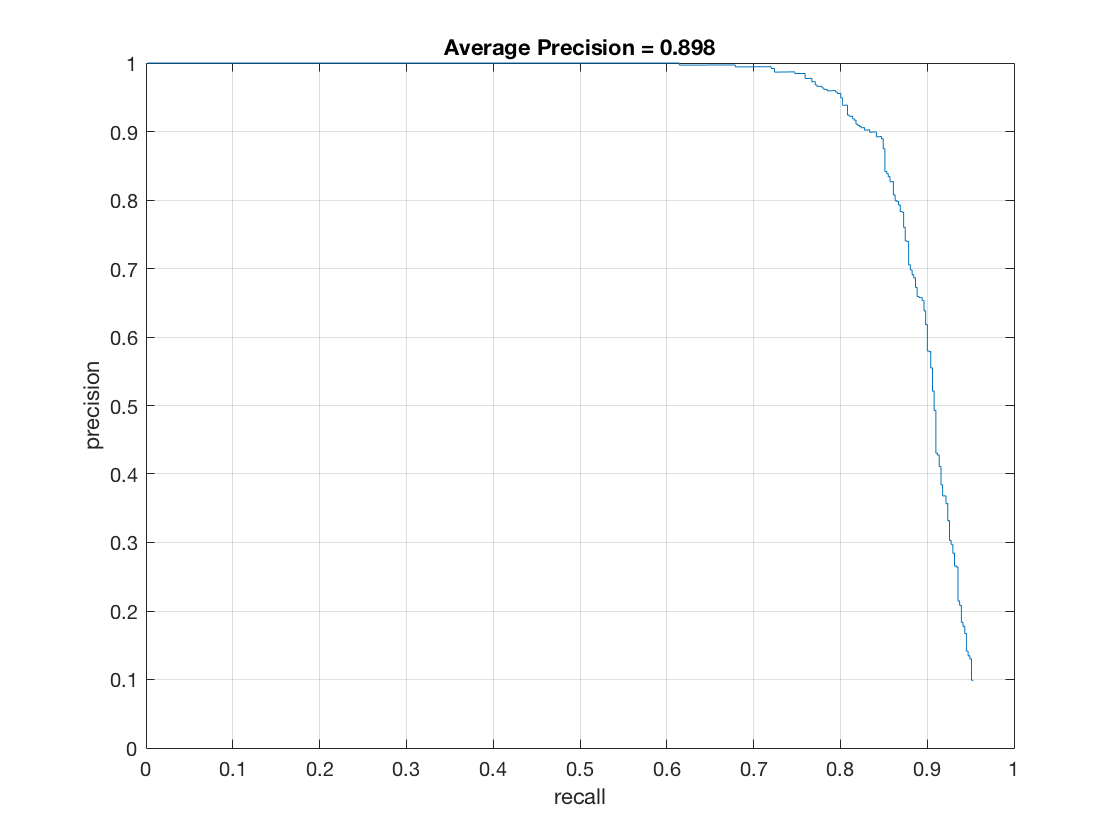
Below is the corresponding HoG template. It looks like the shape of a face.
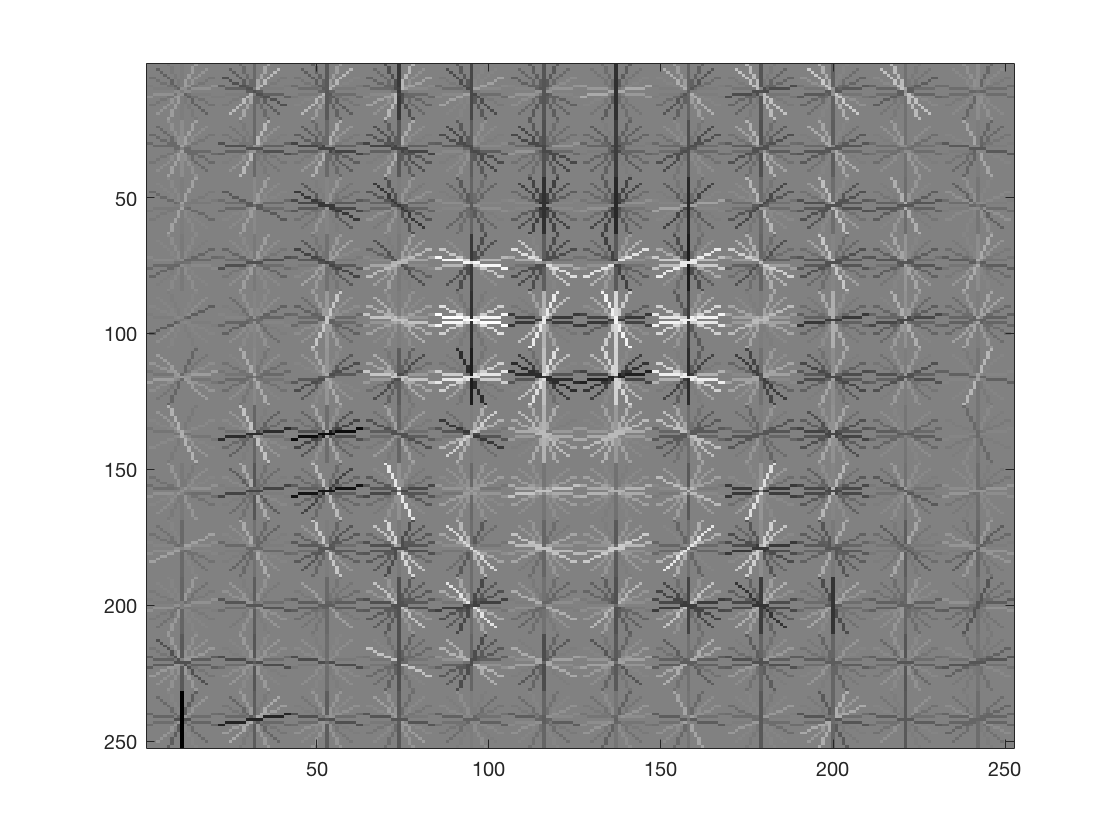
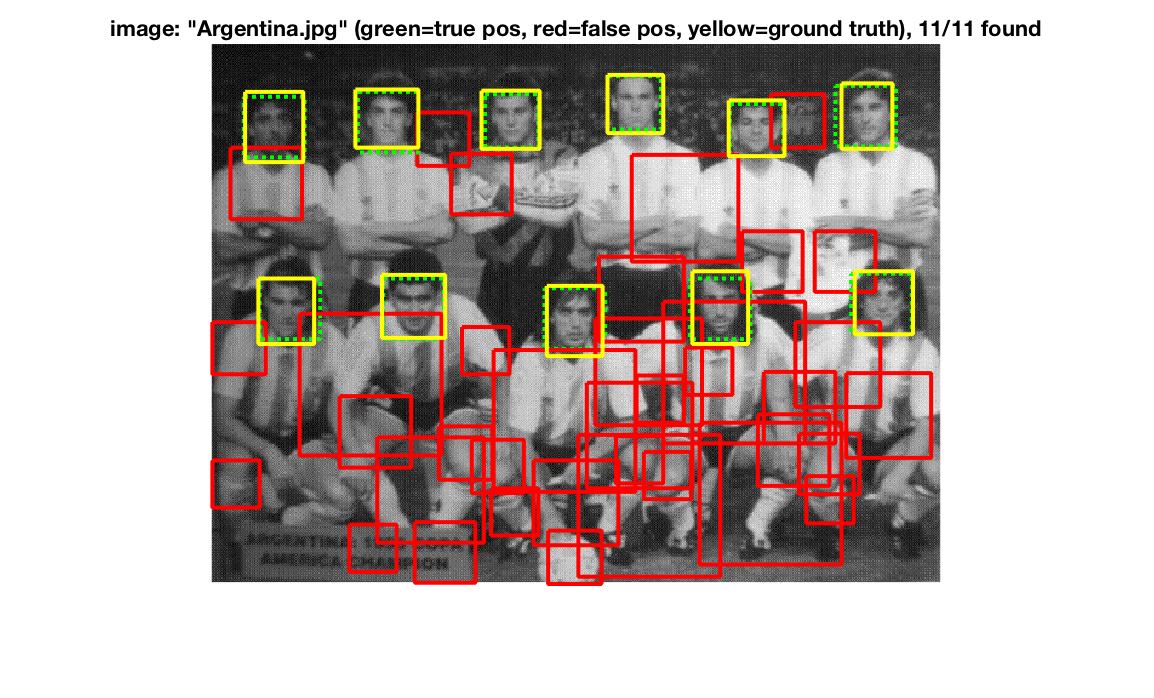
Below is an example of detection on the testing image and on our class photo.
Extra credit:
Hard negative mining
My implementation is in step 4 in proj5.m. After training with random chosen negative features, run detector on non-face images.I modified run_detector.m to run_detector_mine_hard.m. In run_detector_mine_hard.m, the part for non max suppresion is removed and the step size is 36 px, so that the detection window are not overlapping. Set num_negative_examples = 5000 and compare the average precision with and without hard negative mining. The average precision slightly increases. The result is shown below.
Alternative positive data
I find another face dataset Labeled Faces in the Wild Home
. And I modified get_positive_features.m to extract positive features from Labeled Faces in the Wild Home, the new function is get_positive_features_supp.m. I resize the images from the data set to 36*36 and compute HoG features. And augment the original positive data with these, however, the images contains slightly more than a face, which makes the average precision drops to 70%. If you want to test on the data set, download the folder lfw and extract in the data folder, uncomment line 60 and 75 in proj5.m.