CarFinder v1.0
Paul Bennett [bennett@cc.gatech.edu]
Significant assistance by Gabriel Brostow [brostow@cc.gatech.edu]
Purpose:
To track a non-deformable body throughout a scene for the purpose of generating an alpha mask of the object.
Application:
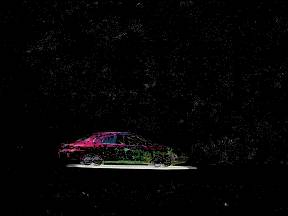
A simple example, and the footage used for proof of concept, is of a car driving down the road. The algorithm will produce a clip of the car without the background information. This car can then be placed an another landscape, for example. Multiple cars in a scene can be individually removed and added back to an empty shot of the scene with the effect that the other cars have vanished.
The example scene could use simple background subtraction to achieve the desired results. The power of the plugin is seen when a moving object is removed from a scene where there are other moving objects
Development:
The algorithm was developed as a plugin in Premiere 5.1. This interface was chosen for its each of use and availability in the industry. The API is small and provided this project with functionality such as file io, memory management, easy access to frames, and the GUI.
Problems:
The Premiere API documentation does not demonstrate the use of several key features of the API. Experimenting and trial and error were the primary resources for discovering the correct semantics. Some example code from previous projects was reviewed and help provide incite into many commands.
The following hurdles were overcome in the API:
Persistent memory between calls to the filter.
Access to frames other then the current frame.
Saving filter settings in the project file.
The algorithm itself was an evolutionary processes. Review the section on the history of the algorithm for a discussion of the problems encountered.
Limitations:
The fill point can not enter or leave the scene
A portion of a moving object can not be cut out—the whole object must be tracked.
Two moving objects can not touch.
The clip can not have any two consecutive frames where there is no movement of the primary object.
The Next Step:
The first point is currently hard coded into the plugin, requiring a recompile for each clip as well as a guestimating the location of the point you want. The next step is to add a GUI interface that will show the first frame of the image to the user and allow them to select the point they wish to use as the start point.
Since binary fills are being used, the user can not select an object within a moving target, a decal, for example. The plugin can not track the movement of the decal, it will track the movement of the entire car and produce an alpha map of the entire car. The next step is to implement texture fills. This would allow the user to select the decal and fill just the decal when generating the alpha map. The entire cars motion would be used in determining the movement of the decal, but only the decal would be in the output clip.
An extension to texture filling would be allowing the user to select multiple fill points as well as different thresholds for each fill point. This would allow, for example, cutting out a car that is painted with a checkerboard. With the single fill point, only the current square would be selected. With multiple fill points, the user could click in each square to insure that the plugin will consider it part of the vehicle. A new GUI will have to be developed to present this functionality to the user.
The texture filling would also make it possible for the plugin to track a foreground car that passes over a background car.
If there is a telephone pole in the foreground and the car passes behind the telephone pole (in relation to the camera) the plugin may output the telephone poll as part of the car. The next step after adding multiple texture fills is to track the color under each point. If a user supplied point’s color changes from one frame to the other, that point is not used for that specific frame, probably because it has moved over the telephone poll. Once that point moved back over the car in future frames, it can then be used again. Admittedly, the application of this may never be used, but it should be added for error control and as a protection against erroneous output.
The algorithm uses the northern most pixel as a starting point when pattern matching for a shadow. Depending on the clip, this could be problematic. For example, if the object was to pass below an overhang, such as a traffic light, there could be complications. Choosing the correct starting point could determine the effectiveness of the plugin. The northern most point was chosen because in the test clip, there is not much vertical motion. If there was a lot of vertical motion, but little horizontal motion, a west most pixel would be a better choice. A more complete solution is to offer the user a choice of north most, south most, centriod, etc.
When there are two consecutive frames in the clip that do not contain movement of the primary object, a shadow can not be calculated. It is the shadow that determines the movement of the object. No shadow, no movement of the fill point, and the plugin will not function. To overcome this limitation add a facility to find valid shadow information from either previous or next frames as needed.
Instructions of use:
Be sure that the clip that you are using this plugin on has an empty frame at the end of the clip.
Simple activate this filter as you would any other filter in Premiere. Set your start fill point in the code and re-compile the plugin. You can then scrub or export your project. Note: Only scrub one frame at a time. Due to the architecture of Premiere, when you scrub frame N, the plugin must compute information on frame N-1, N-2, N-3, to the begging of the clip. It is recommended you only scrub the first few frames, and when satisfied with your starting point, export the entire clip and view it then.
The X and Y fill coordinate that you specify in the code is relative to the size of the image that is being processed. When you scrub, the size of the image is the size of the monitor window. When you export, you explicitly state the size you want the plugin. If you have been scrubbing with 320x240 but now want to export a 640x480, you will need to update the X and Y fill points. Dragging the size of the monitor will change the size of the image the plugin is run against.
The plugin allows you to turn on crosshairs that will show the location of the current and next fill points. These can be helpful in determining what the plugin is up to.
After you export a matte using the plugin, you may use that matte against the original footage to pull out the desired object.
The code:
The code is distributed in a Microsoft Visual C++ project format. The template is from the Premiere SDK video filter example; therefore, the directory structure is labeled as such.
You can view a copy of the code.
Examples:
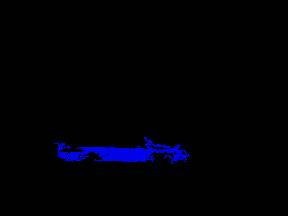
The clip. – the original footage.
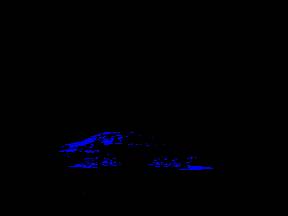
The matte. – this is the output of the plugin.
The matte w/ crosshairs. – this is a diagnostic output of the plugin.
The final clip. – the result of using the plugin.
History of the algorithm:
The first algorithm was as follows:
take a start point on the car
flood fill that frame from that point.
compute delta12
threshold the delta12
take any points in frame1 that are not in delta12. this is the trailing
shadow
flood fill from a point in frame2 <-- problem here
compute delta23
threshold delta23
take any points in frame2 that are not in delta23. this is the trailing
shadow
compute the vector and magnitude of change from the trailing shadows.
apply this change to the starting point, there is your new starting point for
the next frame.
This algorithm [after being mostly coded] was thrown out because we do not have that fill point for frame 2. The flood filling portion of this algorithm also proved ineffective. Because a good flood fill of the car is required to help define the shadow, we had to go to a binary flood fill so that all of the car would be filled instead of using the texture fill.
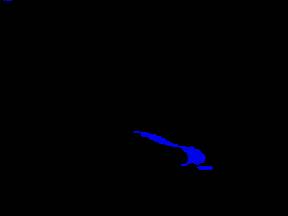
This is the amount of the car that was filled using a texture fill. This was not enough.
When using the above fill, the trailing shadow that was found is above. This is not a good, well defined leading or trailing shadow.
The algorithm was modified to the following:
take delta12
threshold it.
take diff1 [empty scene - frame1]
threshold it
binary flood fill both based on starting point
take points that are in delta12 but not in diff1
we not have our leading shadow12.
run through noise filter
take diff2
take diff3
subtract
we now have a frame full of possible shadows
find the centriod of each blob
match the first shadow (shadow12) up with each blob +- 5 pixels.
when we find the best match, that is the leading shadow23.
find centriod of shadow12
find centriod of shadow23
compute vector
add start point to vector.
After coding this up we got a good shadow12, but shadow23 was broken apart.
Shadow12
Shadow23 before thresholding. You can see how, after thresholding, the shadow would be broken apart.
This is diff1.
We modified the algorithm once again:
The final version of the algorithm:
take delta12
threshold it.
take diff1 [empty scene - frame1]
threshold it
binary flood fill both based on starting point
take points that are in delta12 but not in diff1
we not have our leading shadow12.
run through noise filter
take diff2
take diff3
subtract
we now have a frame full of possible shadows
flood fill all the blobs and number them.
go
through each pixel.
If the pixel has not been observed yet, and is not null, flood fill that point with a counter
Increase the counter
Move to the next pixel.
throw out blobs that are less then 10 pixels
go through each pixel
count the number of 1s, 2s, 3s, etc.
now go back through each pixel again and replace all the 1s if there were only 10 found, etc.
with the remaining pixels, located the north most pixel
slide the shadow12 blob (from its
north most pixel) +-5 pixel on each blob.
find the best fit.
now update the shadow12 matching pattern:
All pixels from diff23 which lined up with ON pixels from
diff12
are now collectively taken as the new template, including
pixels which
were OFF in the template, but are both ON in the diff23 and
part of a blob
which the diff12 template touched
another way to word it: the new matching pattern is now a collective bag that contains all the blobs that were touched when looking for a good match.
this will allow the template to break apart and join depending on how good the shadow’s are that we find.
once we find the match we now have
shadow23
compute the north most pixel of shadow12
compute the north most pixel of shadow23?
Compute a vector between the two
north most points.
update the fill point.
We are now done with this frame. Continue to the next frame and start over.
Possible problem with north most pixel:
what if the real shadow I am looking for looks like this:
xx
xxxxxxxxxxx
xxxxx
xxxxx
xxxxx
xxxxx
and the pattern (shadow12) we use to find the above shadow is
xxxxx
xxxxx
xxxxx
xxxxx
xxxxx
with the north most pixel idea, this will not be a match!
Solution: There is no solution to this problem. Noise is a fact that we have to deal with. Choosing a different point (north most, south most, etc) based on the clip itself, may increase the effectiveness of the plugin.
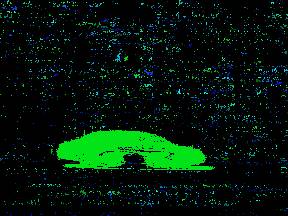
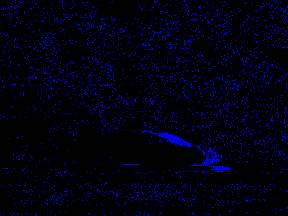
This is a visual display of the array that identified all the individual blobs in the image. Each different blob has a different color. Some of the blobs appear to be the same color in this image because they are different by a small margin.