Installing JDK in Windows 9x
- The first step to install JDK is to open the C:\Temp directory as show below.
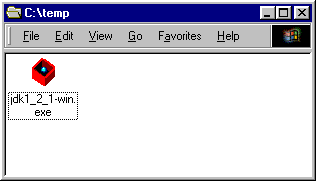
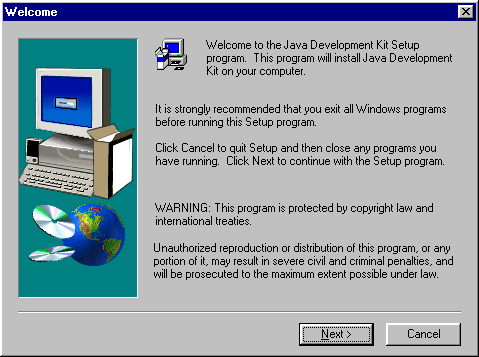
- Then double click on the icon that looks like a red box, and you will then see
the file decompress so it can run the install. The first screen of the
install appears as follows. And click on the
“Next” button when you have read the “Warning” screen.
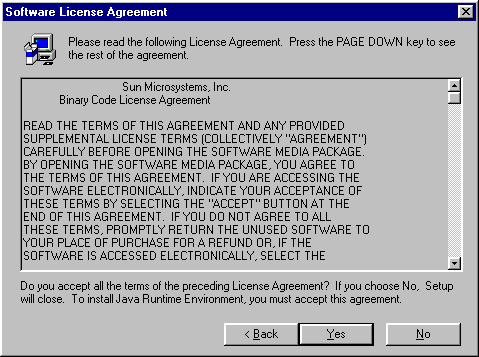
 The next screen asks you to read and agree to the End User License Agreement.
If you do not click “Yes” you will not be able to install JDK.
The next screen asks you to read and agree to the End User License Agreement.
If you do not click “Yes” you will not be able to install JDK.
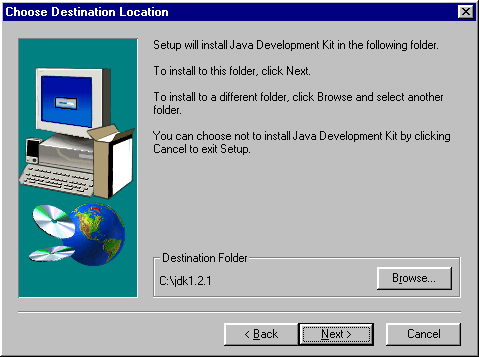
 Then you will be able to select the directory where JDK will be installed. We
will select the default “C:\jdk1.2.1” if you select something different make a note of it for later reference.
Then you will be able to select the directory where JDK will be installed. We
will select the default “C:\jdk1.2.1” if you select something different make a note of it for later reference.
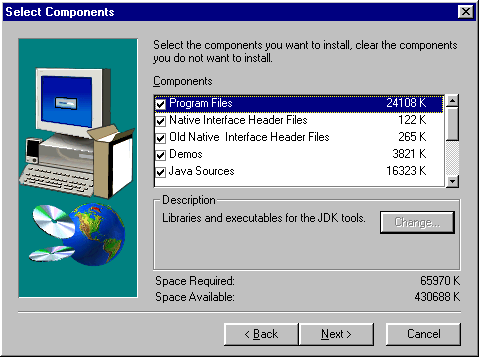
 The next screen allows you to select or deselect certain components. Do not
change what is selected here unless you know a lot about JDK. Just click “Next” here.
The next screen allows you to select or deselect certain components. Do not
change what is selected here unless you know a lot about JDK. Just click “Next” here.
 When you click next the install will begin. After it is over you will be
asked to agree to another End User License Agreement to install the JRE component.
When you click next the install will begin. After it is over you will be
asked to agree to another End User License Agreement to install the JRE component.
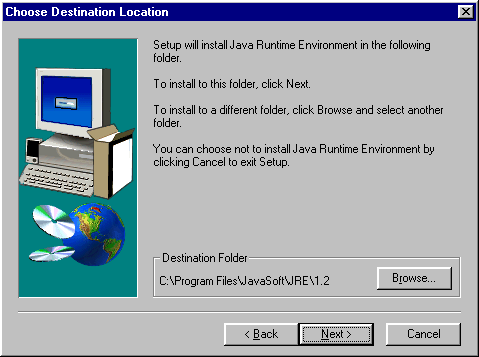
 And again we will go ahead and use the default directory to install the JRE
component. So just click “Next” here.
And again we will go ahead and use the default directory to install the JRE
component. So just click “Next” here.
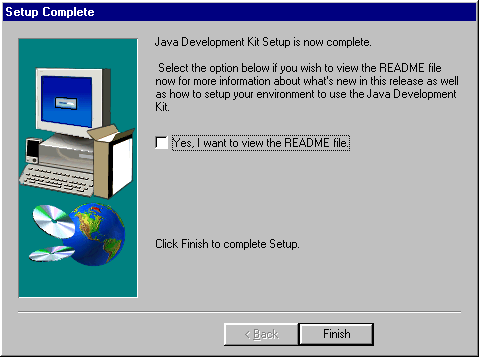
 Once you have done that you will see the JRE component installed. Then you
will see the final screen. You can just click “Finish” here!
Once you have done that you will see the JRE component installed. Then you
will see the final screen. You can just click “Finish” here!
 Now, please follow the instructions for Modifying your PATH statement