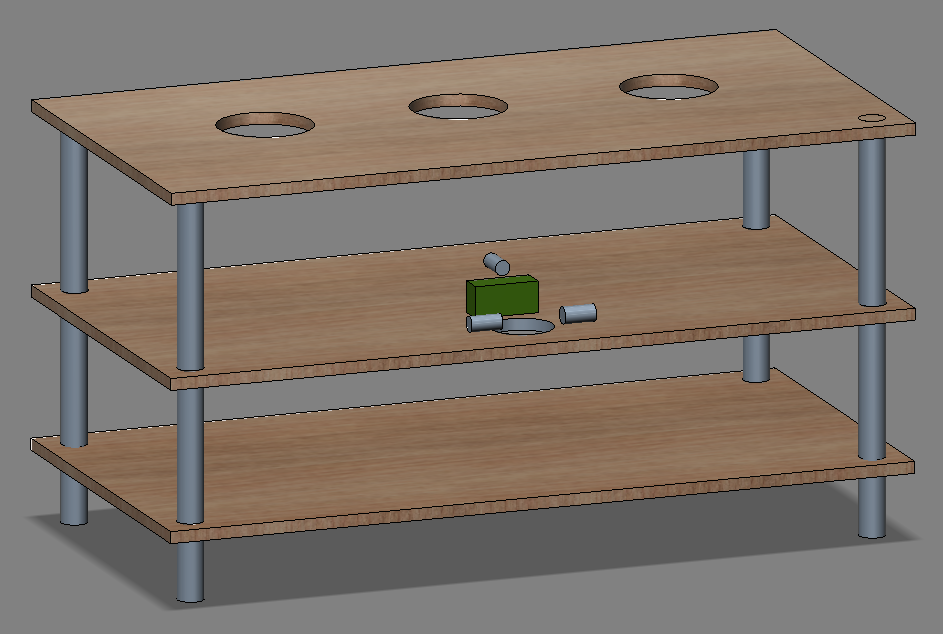
Initial Design
Below is a basic CAD drawing of the BARduino. This drawing omits bottles and tubing. The solenoid valves are represented as small blue cylinders and the ultrasonic sensor is represented as a small green box.
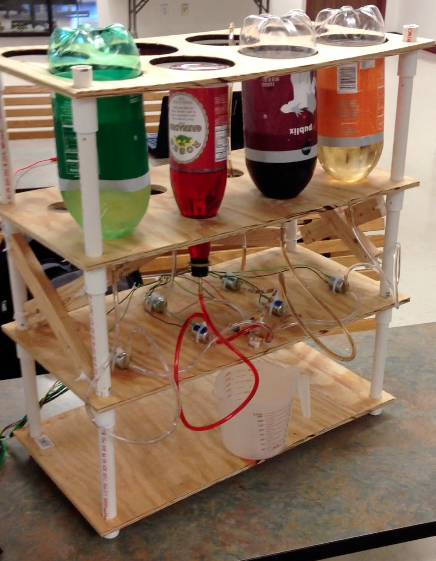
Final Structure
The final structure included support for holding up to 8 bottles and could dispense out of up to 6 bottles at the same time. We ended up using a four-tier system which enabled us to stabelize the 2-liter bottles while still effieciently pouring drinks. The whole structure had to be stablized using a tensile system combining zip-ties and wooden planks. The solenoid valves were secured using zip-ties as well. For a look at the final result, see below.
User Interface & Electronics
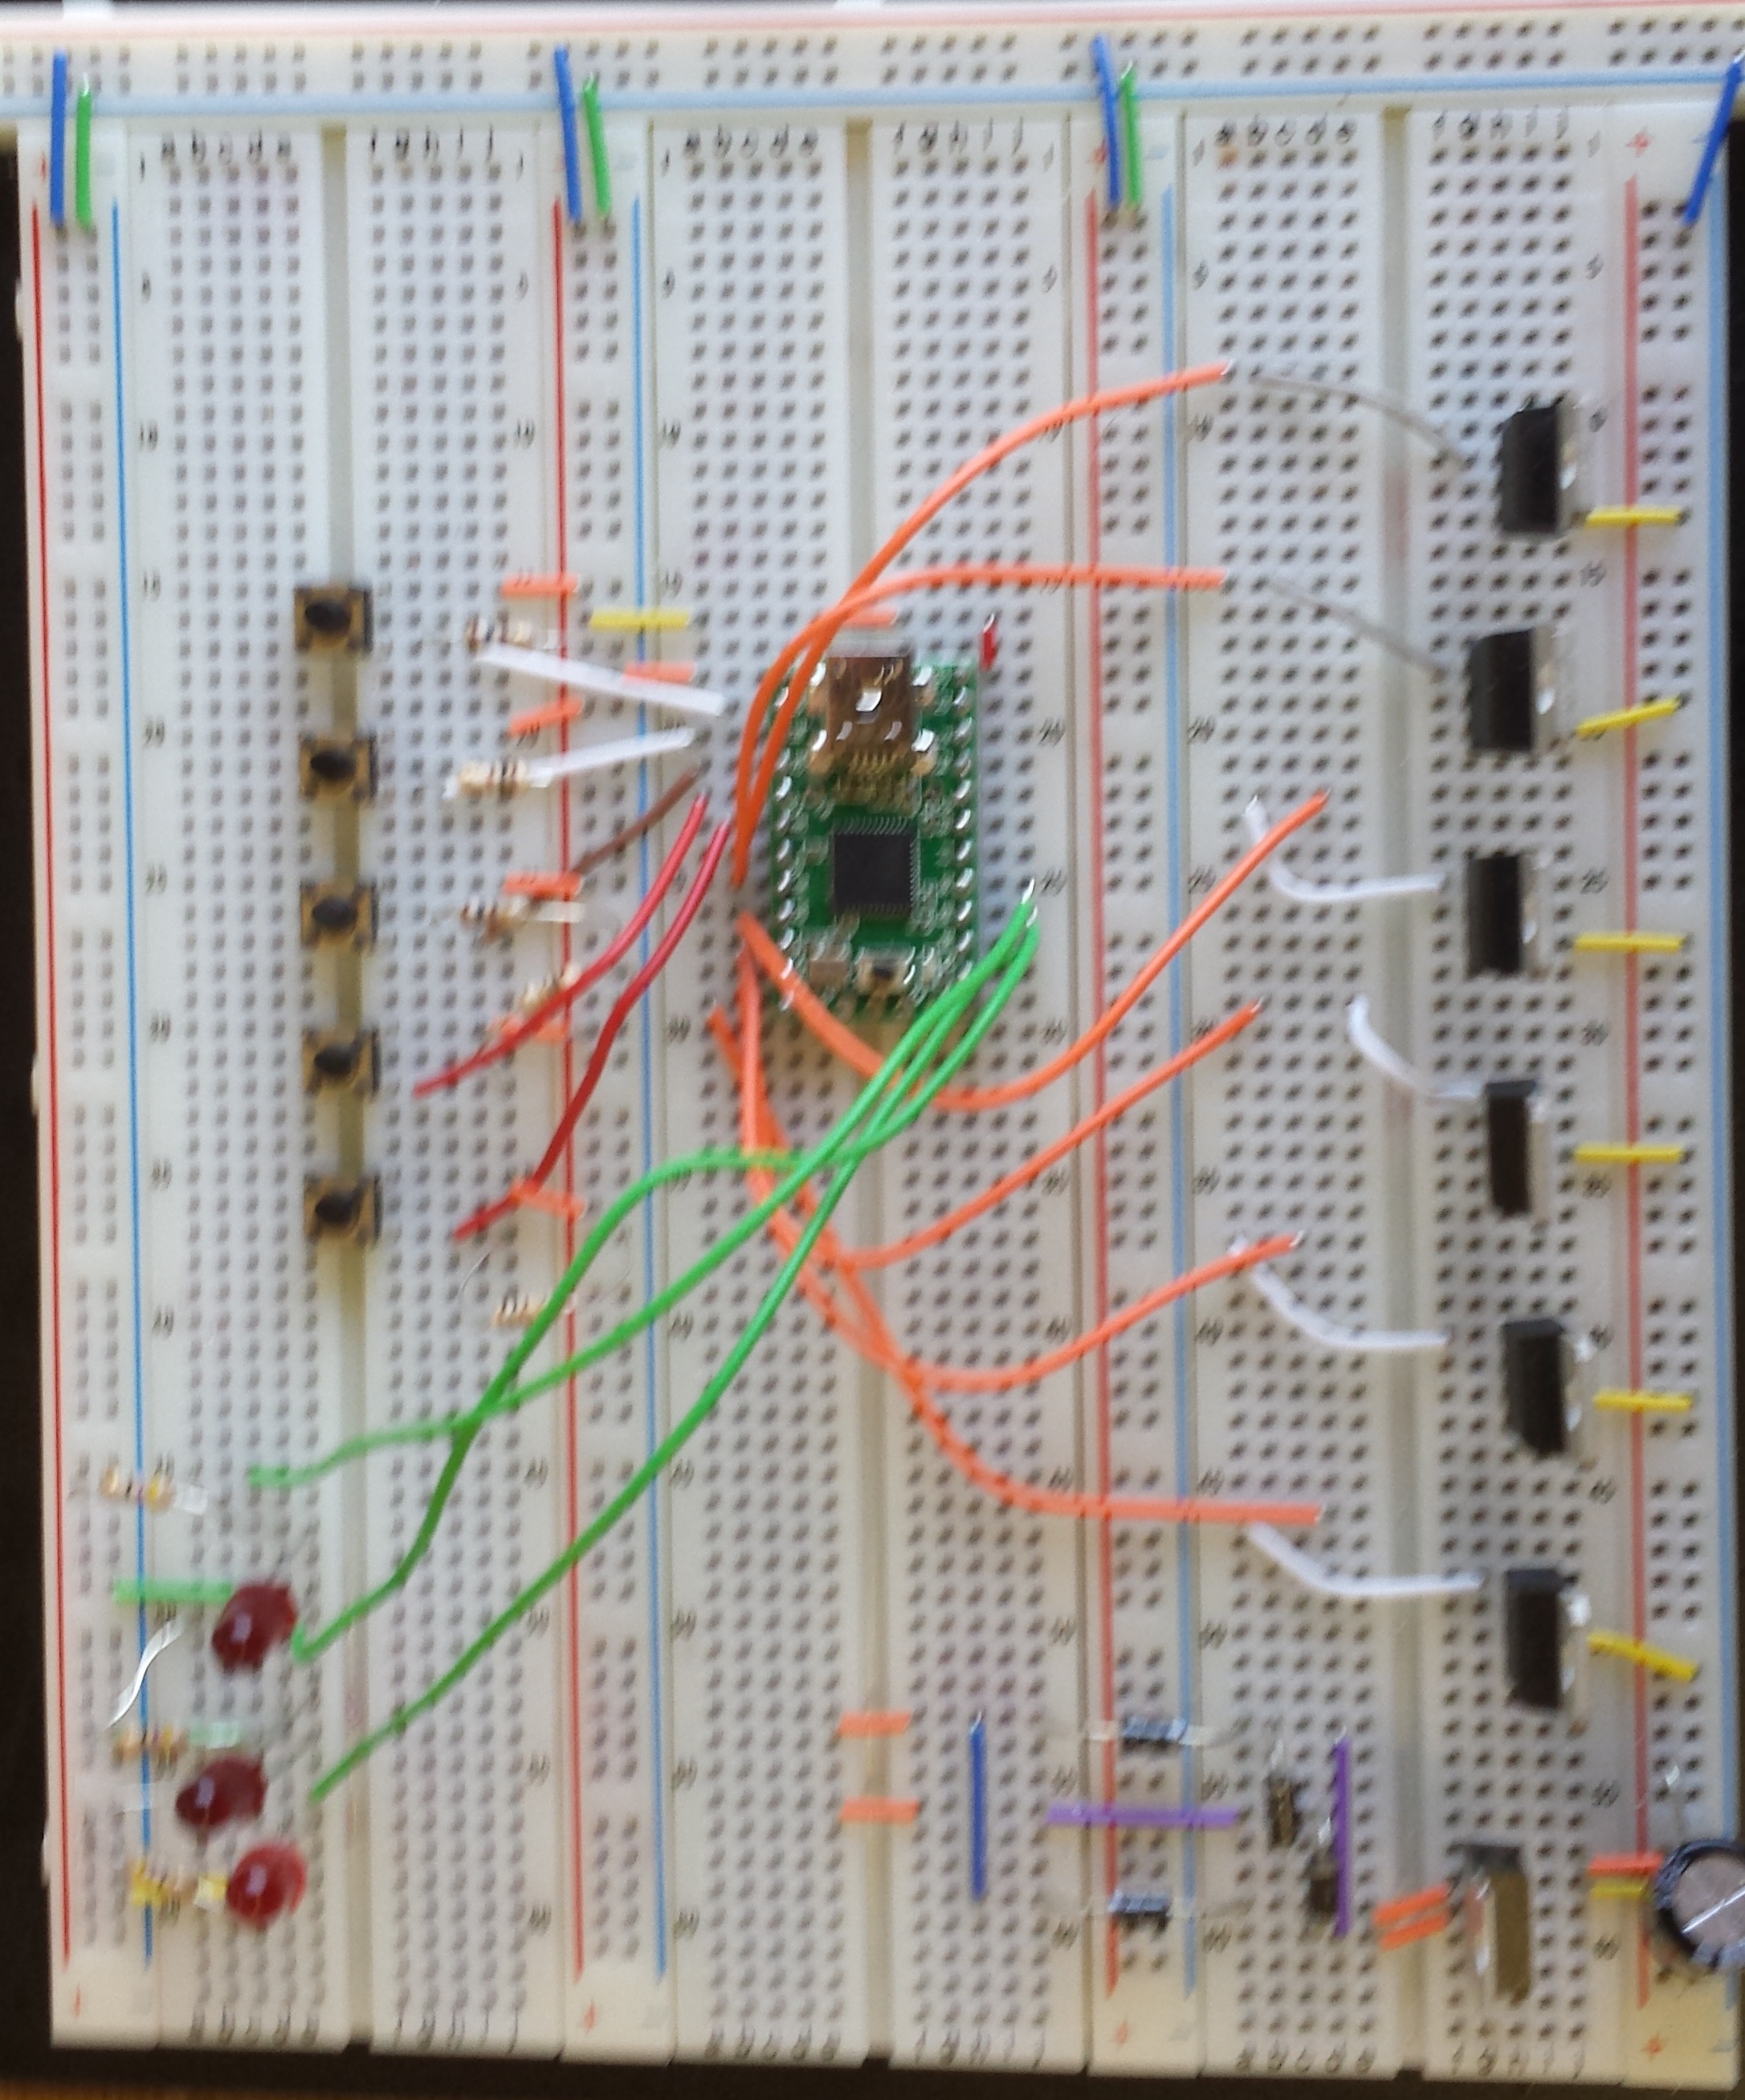
The User Interface ended up being tied directly to the breadboard. For each of the 5 buttons you can see on the top left side of the board, there is a uniquely programmed recipe. Also, if a bottle is empty, the user will be notified via a binary number represented as LEDs in the lower left side of the board. The least significant bit is the lower LED and the most significant bit is the upper led. The number given corresponds to an exact bottle location on the structure. The rest of the electronic system is quite simple. There is a full-wave rectifier with a capacitor and a 35v to 12v linear regulator in the lower right corner. The voltage source from the regulator is hooked up to each mosfet transistor on the top right side of the board. This allows the Teensyduino [center] to easily control each 12v solenoid valve [which are not pictured here].
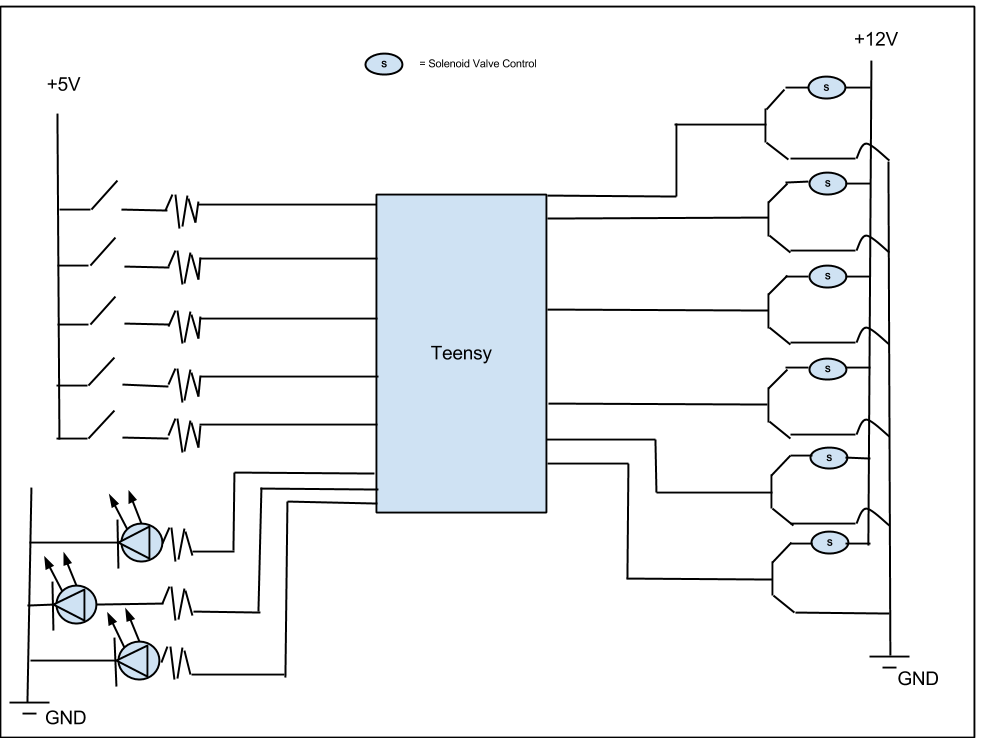
Circuit Diagram
A basic circuit diagram of the BARduino can be seen below.